Troubleshooting Headphone Detection in Windows 11 and 10? 14 Fixes That Work (July, 2026)
By Jon — Windows Audio Expert | | 35 min read | Tested on Windows 11 24H2 & Windows 10 22H2
How to Troubleshoot Headphone Detection Issues
To troubleshoot headphone detection issues, you can follow these steps:
- Check Default Audio Device: Ensure that your headphones are set as the default audio device in your system settings. Right-click the speaker icon in the taskbar, open Sound Settings, and select your headphones under Output.
- Check the Connection: Plug your headphones in all the way, into the right port. If it's a combo jack, make sure the plug has three black rings and is pushed in fully. Try the headphones on another device to check if the cable or plug is broken.
- Try Different Headphones: If another pair works fine, your original headphones are probably broken. If the new headphones also don't work, the problem is likely with your device, not the headphones. Check the headphone jack for dust, dirt, or damage before trying again. If nothing works, try a different port or device to be sure.
- Test the headphones on another device: Connect the headphones to a different device, such as a smartphone or another PC, to verify that they are working properly. If the headphones function as expected on the second device, the issue is likely related to the original computer rather than the headphones themselves.
- Update Audio Drivers: Outdated or incorrect audio drivers can cause detection issues. Update or roll back your audio drivers as needed. Open Device Manager, expand Sound, video and game controllers, right-click your audio device, and choose Update driver.
- Inspect the Headphone Jack and Cable: Check the headphone jack and cable for any signs of dust, debris, physical damage, or loose connections. Make sure the headphone plug is securely and fully inserted into the correct audio port, as an incomplete connection can prevent the device from detecting or using the headphones properly.
- Restart your device : This clears up small glitches in the audio system. It often fixes the problem when your headphones aren't being detected.
- Use Audio Troubleshooter: Run the built-in audio troubleshooter in Windows by going to Settings > System > Troubleshoot > Other troubleshooters and selecting the Playing Audio troubleshooter.
- Enable Disabled or Disconnected Audio Devices: Press Win + R, type mmsys.cpl, and press Enter. In the Playback tab, right-click an empty area and enable Show Disabled Devices and Show Disconnected Devices. If your headphones appear grayed out, right-click them, select Enable, and set them as the Default Device.
- Try Different USB Ports: If your headphones are USB-connected, try plugging them into a different USB port to resolve detection issues. Use a rear port directly on the PC rather than a hub.
- Close Applications That May Be Controlling Audio: Some applications, such as music players, video editing software, or communication tools, can take exclusive control of audio devices and cause conflicts. Close any programs that may be using the audio output, then test the headphones again to see if the issue is resolved.
- Check for Windows Updates: Ensure your Windows is fully updated, as updates can include fixes for audio issues. Go to Settings > Windows Update > Check for updates.
These steps should help you resolve headphone detection problems effectively.
How to Fix Headphone Detection Problems on Windows in 7 Steps
If your PC isn't recognizing your headphones, don't panic — this is one of the most common audio issues on Windows, and it's usually fixable in a few minutes. Here's what actually works:
- Set your headphones as the default device — Windows sometimes reverts to speakers after a restart or update. Go to Sound Settings and manually select your headphones as the default output.
- Update Audio Drivers — Outdated drivers are a classic culprit, especially after a Windows update. Check Device Manager under "Sound, video and game controllers" and update accordingly.
- Run audio troubleshooter — Go to Settings → System → Troubleshoot → Other troubleshooters → Audio. It catches common configuration issues automatically.
- Try different USB port — For USB headphones, a specific port may be losing power delivery. Plug directly into a motherboard port rather than a hub.
- Check Windows updates — Microsoft regularly ships fixes for audio bugs. Go to Settings → Windows Update, install anything pending, then restart and retest.
- Restart the Windows Audio Service — Sometimes it's not the driver but the background service running it. If Windows Audio glitches or stalls, your headphones may show as undetected even though everything's installed correctly. Press Win + R, type services.msc, find Windows Audio, right-click, and hit Restart.
- Update Audio Drivers — An outdated or glitchy audio driver is one of the most common reasons headphones stop being detected. Open Device Manager, expand "Sound, video and game controllers," right-click your audio device, and hit "Update driver." If that doesn't work, uninstall it and restart — Windows will reinstall a fresh version automatically.
Still not detected? Test the headphones on a phone or another PC first. If they work there, the issue is software-side on your Windows install — no need to replace anything.
Press Win+R, type mmsys.cpl, press Enter, right-click anywhere in the Playback tab, select Show Disabled Devices, then right-click the greyed-out headphone entry and click Enable → Set as Default Device. If headphones still do not appear, restart the Windows Audio service: Win+R → services.msc → Windows Audio → Restart. Still not working? Reinstall your audio driver from your PC manufacturer's support page — Windows updates frequently overwrite it.
Quick Summary — Headphones Not Detected in Windows
| Problem | Windows 11 or 10 does not detect headphones plugged into the audio jack, USB port, or via Bluetooth |
| Root Causes | Wrong default output device, disabled/hidden audio device, ghost audio devices, outdated or replaced audio driver, Realtek/IDT/Intel SST jack detection off, audio enhancements conflict, exclusive mode lock, stopped Windows Audio service, Bluetooth service failure |
| Fastest Fix | Press Win+R → mmsys.cpl → right-click Playback tab → Show Disabled Devices → Enable headphones → Set as Default Device |
| After Windows Update | Reinstall OEM audio driver from your laptop or motherboard manufacturer's site. Re-check Enhancements and Spatial sound tabs — 24H2 updates re-enable both silently. |
| Headphone Types Covered | 3.5mm wired, USB headsets, Bluetooth, and USB-C adapter headphones |
| Verify the Fix | Settings → System → Sound → click headphones → Test, or use mictest.pro/sound-test |
Start Here — These Five Fixes Solve It for Most People
Before working through all 14 fixes, try these. They cover the vast majority of headphone detection failures — including the most common issues caused by Windows 11 24H2 updates:
- Set headphones as the default output device — Settings → System → Sound → Output dropdown
- Enable disabled playback devices — Win+R →
mmsys.cpl→ Playback tab → right-click → Show Disabled Devices - Restart the Windows Audio service — Win+R →
services.msc→ Windows Audio → Restart - Reinstall the OEM audio driver from your manufacturer's support page (not Windows Update)
- Disable audio enhancements and spatial sound — Sound Settings → device Properties → Enhancements tab → Disable all enhancements
Hardware check first: Test your headphones on a phone or another PC. If they work there, the problem is 100% software inside Windows — nothing to buy, nothing to replace.
All 14 Fixes at a Glance
- Fix 1: Check the physical connection — unplug, wait 5 seconds, re-insert; use rear jack on desktops
- Fix 2: Set headphones as the default output — Settings → System → Sound
- Fix 3: Show disabled devices — Win+R → mmsys.cpl → right-click Playback tab → Show Disabled Devices
- Fix 4: Restart Windows Audio services — services.msc → Windows Audio → Restart
- Fix 5: Run the Playing Audio Troubleshooter — Settings → System → Troubleshoot
- Fix 6: Disable audio enhancements and spatial sound (especially after 24H2 updates)
- Fix 7: Disable exclusive audio mode — mmsys.cpl → headphone Properties → Advanced tab
- Fix 8: Update or reinstall the audio driver from your manufacturer's site
- Fix 9: Configure Realtek / IDT / Intel SST jack detection popup
- Fix 10: Remove ghost audio devices — Device Manager → View → Show hidden devices
- Fix 11: Bluetooth — remove device and re-pair from scratch
- Fix 12: USB headset — plug into rear port, fix USB power management
- Fix 13: Disable Fast Startup — Control Panel → Power Options
- Fix 14: Repair Windows system files — sfc /scannow then DISM
Table of Contents
- How to Troubleshoot Headphone Detection Issues
- Why Windows Fails to Detect Headphones — Root Causes in 2026
- Identify Your Headphone Type Before You Start
- Fix 1: Check the Physical Connection
- Fix 2: Set Headphones as Default Output Device
- Fix 3: Show and Enable Hidden Playback Devices
- Fix 4: Restart Windows Audio Services
- Fix 5: Run the Playing Audio Troubleshooter
- Fix 6: Disable Audio Enhancements and Spatial Sound (24H2 Fix)
- Fix 7: Disable Exclusive Audio Mode
- Fix 8: Update or Reinstall Your Audio Driver
- Fix 9: Configure Jack Detection — Realtek, IDT, and Intel SST
- Fix 10: Remove Ghost Audio Devices
- Fix 11: Fix Bluetooth Headphone Detection
- Fix 12: Fix USB Headset Not Detected
- Fix 13: Disable Fast Startup (Headphones Stop After Sleep)
- Fix 14: Repair Windows System Files — Last Resort
- Headphones Detected but Audio Is Distorted or Crackling
- Common Problems and Quick Solutions
- How to Keep Headphone Detection Working Long-Term
- Quick Reference Table
- Test Your Headphones After Fixing
- Frequently Asked Questions
Why Windows Fails to Detect Headphones — Root Causes in 2026
The same handful of root causes show up again and again across Windows 10 and Windows 11 headphone detection failures. Once you understand what's actually happening, the right fix becomes obvious. Here's what goes wrong:
- Default output not set: Windows detected the headphones but kept routing audio to speakers. Extremely common after reboots and updates.
- Device hidden or disabled by Windows: Windows silently disables audio endpoints it thinks are inactive — often after updates or power cycling. The device simply vanishes from Sound Settings with no warning.
- Windows Audio service crashed: After hard reboots or failed updates, the audio service stops entirely. No audio device is detected until it's restarted.
- Audio driver overwritten by Windows Update: Feature updates like Windows 11 24H2 replace Realtek, IDT, or Intel drivers with a generic Microsoft one that has no jack-switching capability at all.
- Ghost audio devices: Leftover entries from GPU driver installs, USB headset swaps, or Windows updates conflict with detection even when not physically connected.
- Audio enhancements conflict: Spatial sound features (Windows Sonic, Dolby Atmos) re-enabled by 24H2 cumulative updates break standard headphone output routing. Confirmed to be silently re-enabled by 2025–2026 updates.
- Exclusive audio mode lock: Apps like Discord, OBS, games, and media players can lock the audio device entirely, blocking Windows and everything else.
- Realtek / IDT / Intel SST jack detection not triggered: The "what did you just plug in?" popup never appeared — so Windows never confirmed it was headphones.
- AC97 vs HD Audio wiring (desktops): Some desktop builds have both AC97 and HD Audio connectors for the front panel. If you've connected AC97 instead of HD Audio on the motherboard header, front-panel jack detection breaks entirely.
- Bluetooth pairing or service failure: The Bluetooth Support Service stopped, or the pairing record became corrupted.
- USB power management: Windows shuts down USB ports to save power, disconnecting USB headsets after sleep.
- Sample rate mismatch: Windows defaults to the highest available sample rate. If the driver doesn't support it, the headphone endpoint fails to initialise — it appears detected but produces distorted or no sound.
- Corrupted Windows system files: A failed update damages core audio files like audiodg.exe or mmdevapi.dll — no fix holds until the files are repaired with sfc /scannow.
Almost all of these are software fixes. Only physical port damage involves hardware. Always rule out hardware first — plug your headphones into a phone or another PC. If they work there, the problem is 100% inside Windows.
Identify Your Headphone Type Before You Start
Different headphone connections have different failure modes. Match your type to the right fix and you'll save a lot of time.
Which Type Are Your Headphones?
Most common. Affected by jack detection, Realtek/IDT/Intel SST settings, and driver issues. Start with Fixes 1 → 2 → 3 → 9.
Appears as separate audio device. Affected by USB port, ghost devices, and driver. Start with Fixes 1 → 2 → 3 → 12.
Wireless. Affected by pairing records and Bluetooth service. Go directly to Fix 11.
Same as USB. May need a specific adapter driver. Use Fixes 1, 2, and 12.
Work through fixes in order — most users solve the issue by Fix 4.
Fix 1: Check the Physical Connection
Rule Out Hardware FirstAlways start here. A loose plug, dirty jack, or wrong port causes more detection failures than most people expect — and takes under a minute to check.
- Restart your PC with the headphones already plugged in. This forces Windows to detect all connected devices during startup and often fixes intermittent detection issues on its own.
- If that doesn't help: unplug fully, wait 5 full seconds, then reinsert firmly until it clicks or seats completely.
- If you have a desktop PC, try the rear-panel audio jack — it connects directly to the motherboard and is far more reliable than front-panel jacks.
- For USB headsets: plug directly into a USB port on the PC itself, not a hub. Unpowered hubs cause power and data issues that prevent detection.
- Clean the port gently with a dry cotton swab to remove dust or lint.
Fix 2: Set Headphones as the Default Output Device
#1 Most Common FixThis solves the problem for roughly 40% of users. Windows detects your headphones but keeps routing audio to the last-used output — usually laptop speakers or a monitor. Plugging headphones in doesn't automatically switch the default output in most Windows configurations.
- Quick method: Click the speaker icon in the taskbar → click the small arrow icon next to the volume slider → select your headphones from the list.
- Settings method: Go to Settings → System → Sound. Under Output, click the dropdown and select your headphones. Click the device name to expand it and click Set as default sound device.
- Right-click the speaker icon in the taskbar → Open Sound Settings.
- Under Output, click the dropdown and select your headphones.
- Alternative: right-click speaker icon → Sounds → Playback tab → right-click headphones → Set as Default Device → Apply.
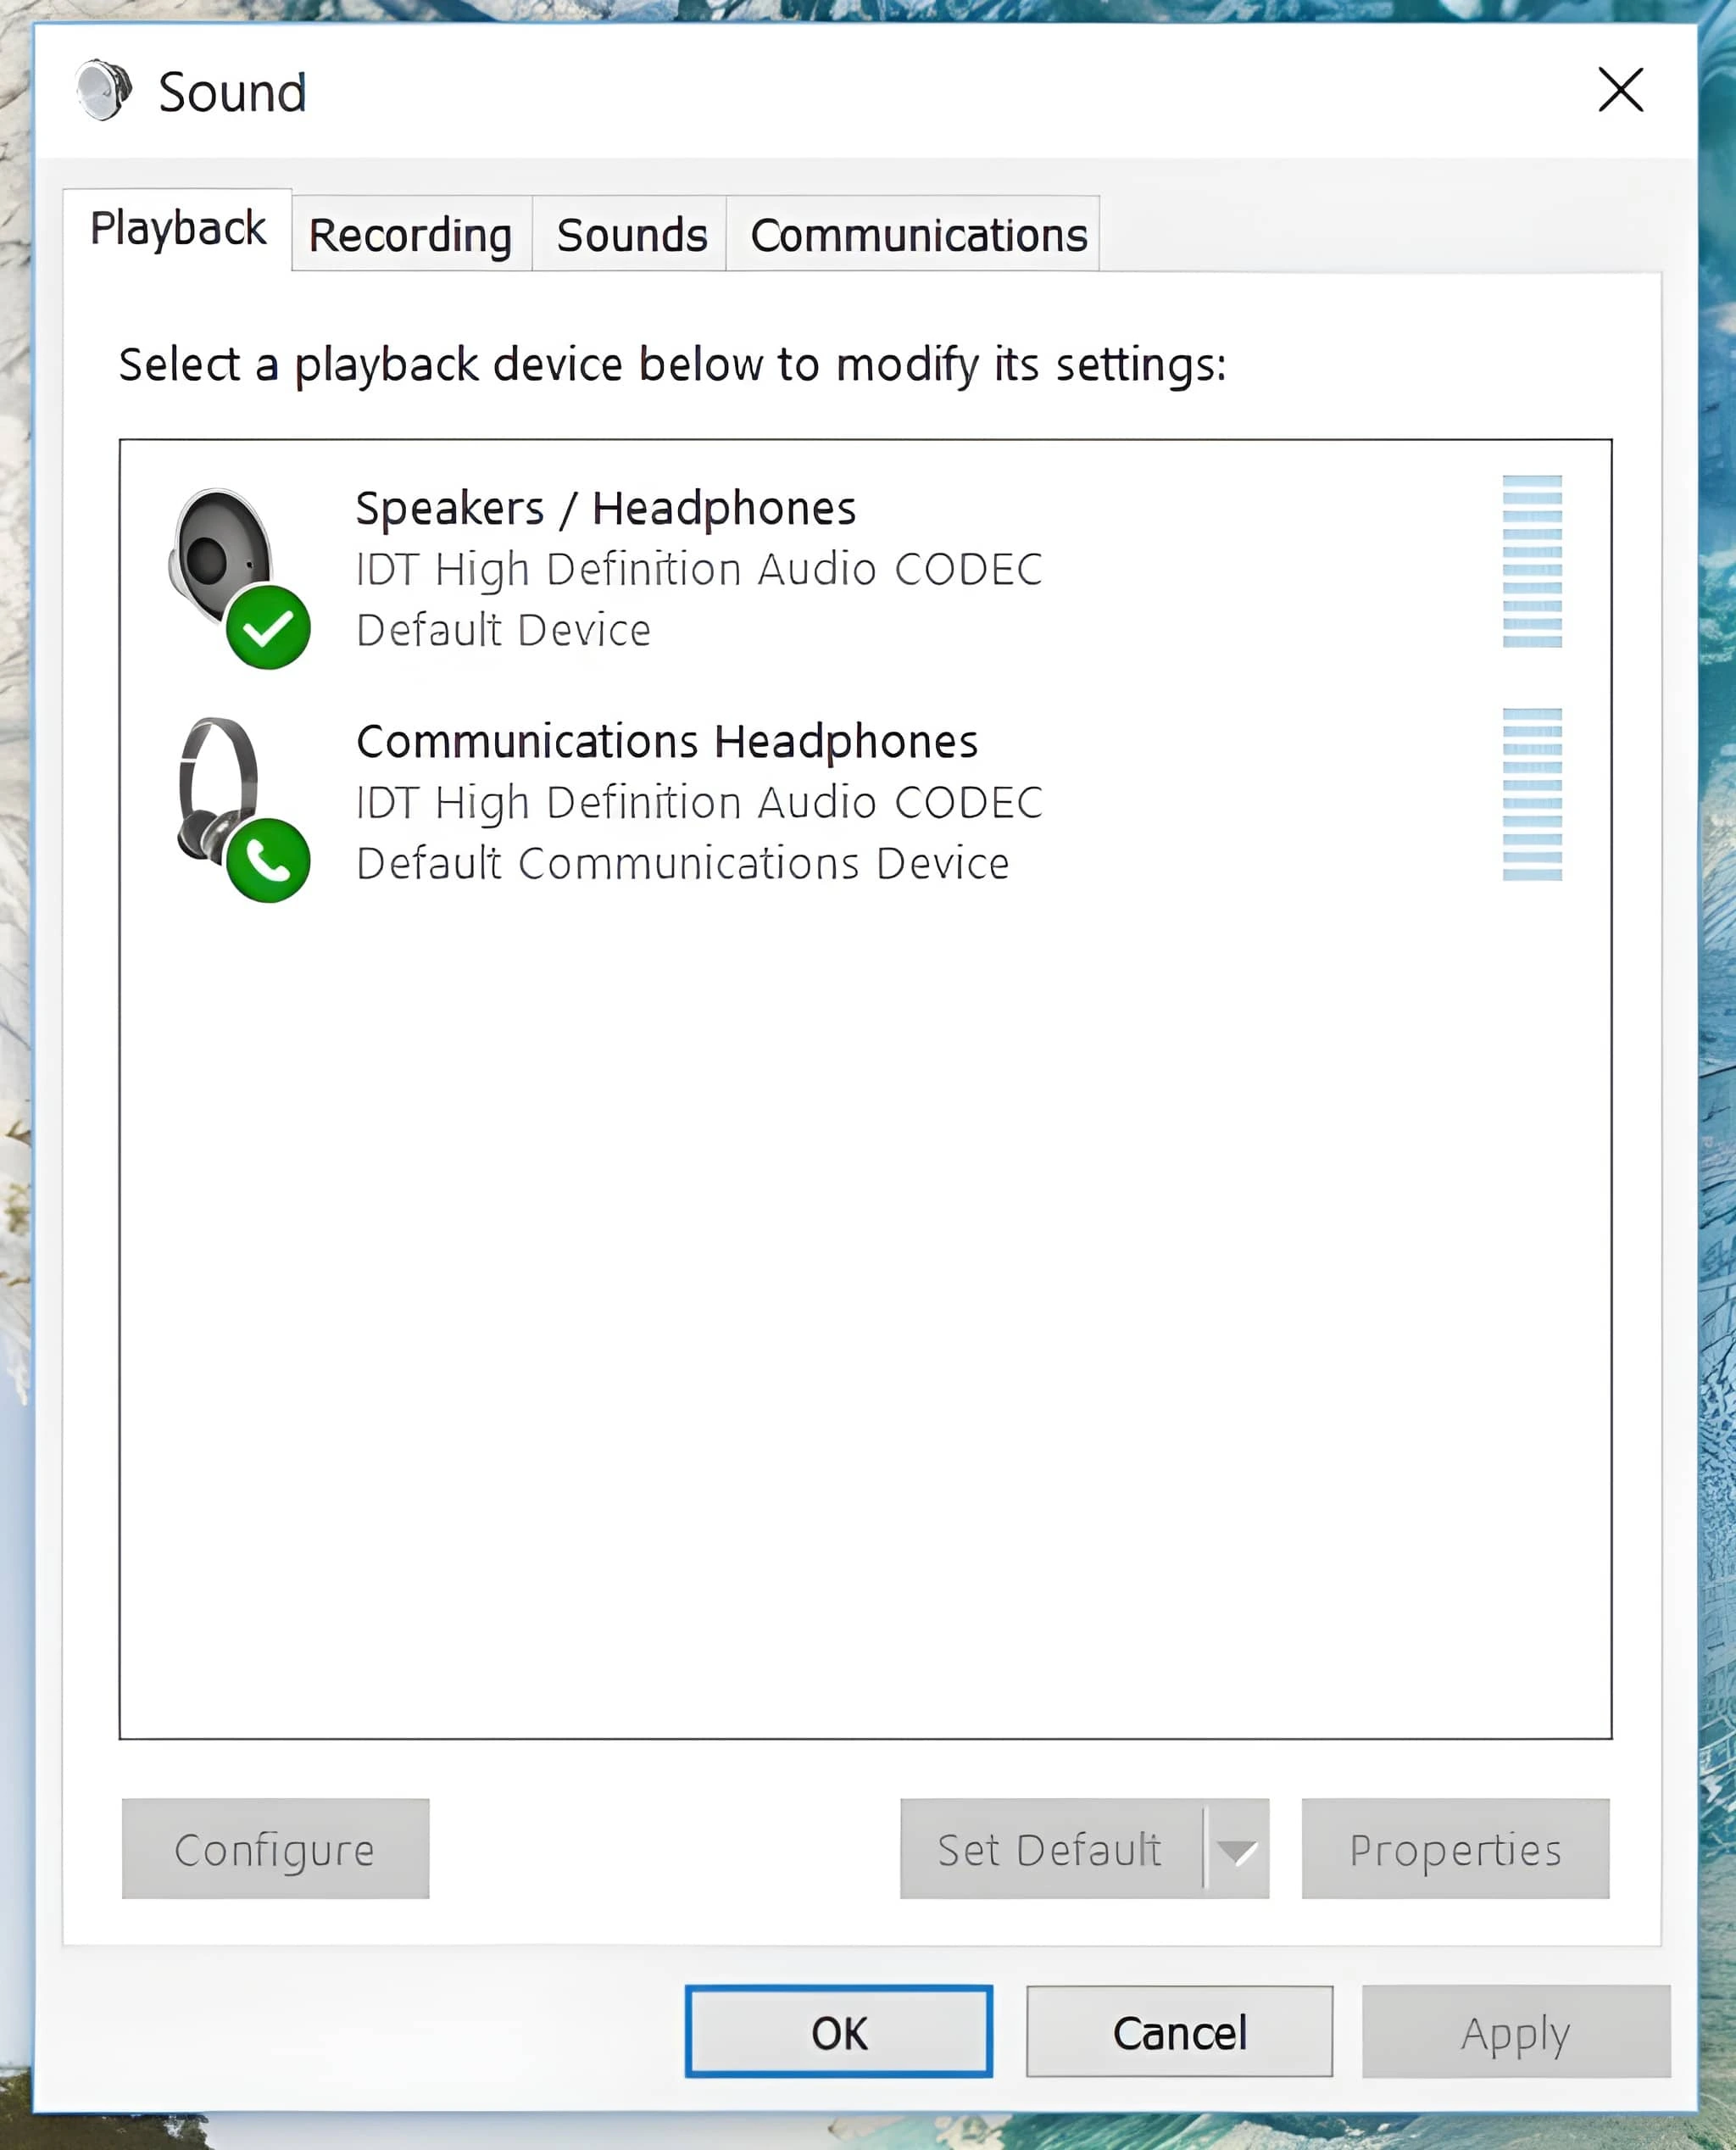
Fix 3: Show and Enable Hidden Playback Devices
Fixes "Not Listed" IssueWindows automatically hides audio devices it considers inactive. Your headphones can simply vanish from the output list with no explanation. They're not broken — they're hidden. This is one of the single most effective fixes for headphones not detected in Windows.
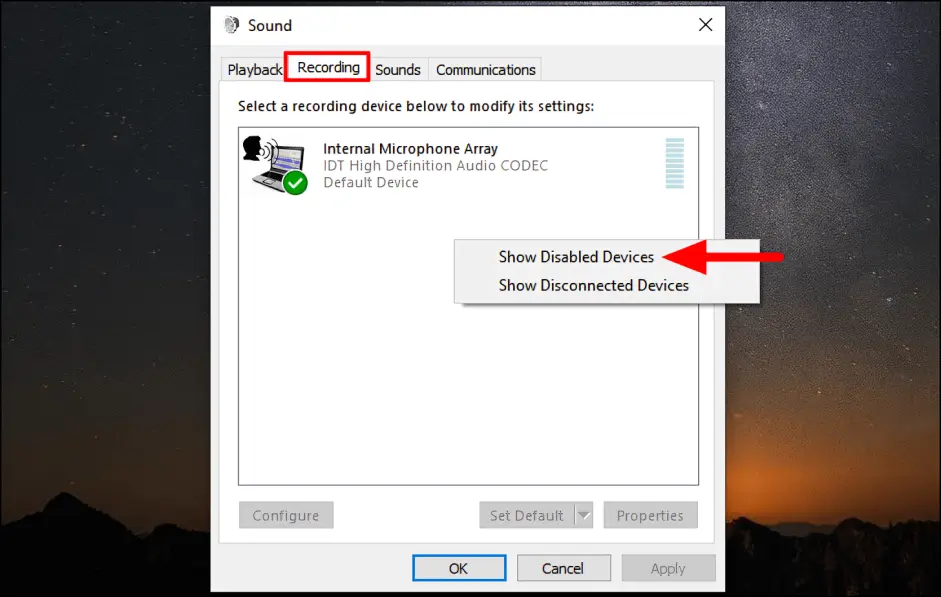
- Press Windows + R. Type
mmsys.cpland press Enter. - Make sure you're on the Playback tab.
- Right-click on any empty space in the device list — even if it looks blank.
- Check both "Show Disabled Devices" and "Show Disconnected Devices".
- Your headphones should now appear with a greyed-out icon.
- Right-click the headphone device → Enable.
- Right-click it again → Set as Default Device.
- Click Apply → OK.
Not sure which fix to try? Match your exact symptom:
| Headphones not in list at all | → Fix 3 (Show Disabled Devices) |
| Detected but sound plays from speakers | → Fix 2 (Set Default Output) |
| All audio suddenly broken | → Fix 4 (Restart Audio Services) |
| Works in some apps but not others | → Fix 7 (Disable Exclusive Mode) |
| Broke after Windows Update | → Fix 6 + Fix 8 (Enhancements + Driver) |
| No popup when plugging in (Realtek) | → Fix 9 (Jack Detection) |
| Ghost device conflict (after GPU/USB swap) | → Fix 10 (Remove Ghost Devices) |
| Bluetooth not found | → Fix 11 (Re-pair) |
| USB headset not detected | → Fix 12 (USB Headset) |
| Stops working after sleep | → Fix 13 (Fast Startup) |
| Non-Realtek laptop (IDT/Intel SST) | → Fix 9 (IDT / Intel SST section) |
| Windows 11 24H2 specific issue | → Fix 6 (Disable Enhancements) |
| Distorted or crackling audio | → Distorted Audio section below |
Fix 4: Restart Windows Audio Services
Service Crash FixThe Windows Audio service manages all sound routing in the OS. If it crashes or stops — which can happen after hard shutdowns, failed updates, or system events — no headphones will be detected regardless of your settings or drivers. Restarting it takes under a minute.
- Press Windows + R → type
services.msc→ press Enter. - Scroll to find Windows Audio.
- Right-click it → Restart. (If it shows Stopped, click Start.)
- Find Windows Audio Endpoint Builder in the list.
- Right-click → Restart.
- Close Services. Plug in your headphones and test.
Fix 5: Run the Playing Audio Troubleshooter
Automated FixWindows' built-in Playing Audio Troubleshooter automatically detects and resolves the most common headphone detection failures — disabled devices, crashed services, misconfigured defaults — in about 90 seconds. Worth running if Fix 4 didn't solve it.
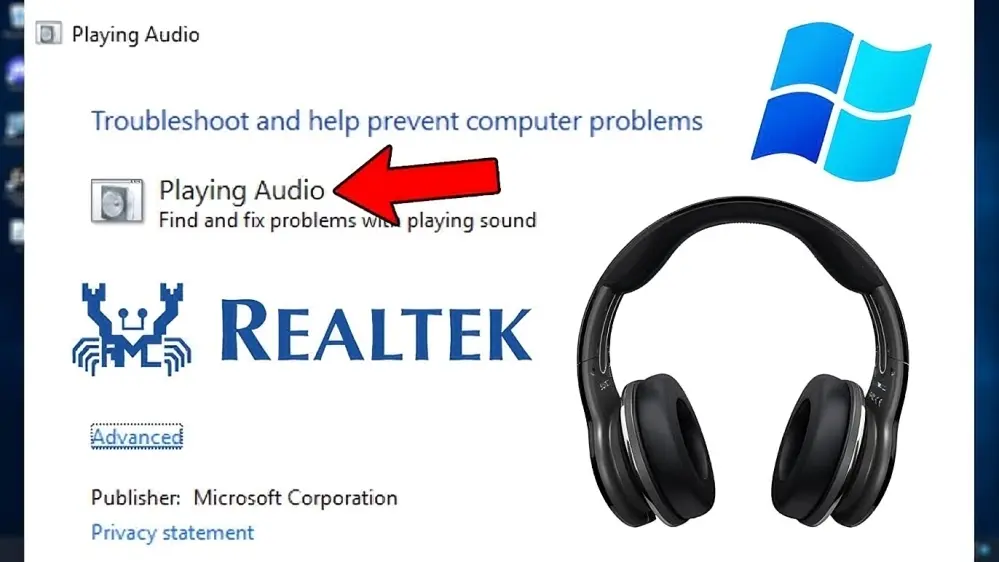
- Press Windows + I to open Settings.
- Go to System → Troubleshoot → Other troubleshooters.
- Find Playing Audio and click Run.
- When asked to select a device, choose your headphones.
- Apply any recommended fixes and restart if prompted.
- Go to Settings → Update & Security → Troubleshoot → Additional troubleshooters.
- Click Playing Audio → Run the troubleshooter.
- Follow on-screen prompts and apply suggested fixes.
- Restart the PC if prompted, then test.
Fix 6: Disable Audio Enhancements and Spatial Sound 24H2 Fix
Windows 11 24H2 Known IssueThis became significantly more common after Windows 11 24H2. Spatial sound features like Windows Sonic, Dolby Atmos, and DTS can conflict with standard headphone output routing. The problem is that 24H2 cumulative updates silently re-enable these settings even if you turned them off before the update.
- Go to Settings → System → Sound.
- Under Output, click on your headphone device name to expand its settings.
- Click Additional device settings.
- Go to the Enhancements tab.
- Check "Disable all enhancements".
- Click Apply → OK.
- In the same device Properties window, click the Spatial sound tab.
- Set the dropdown to Off.
- Click Apply → OK.
Fix 7: Disable Exclusive Audio Mode
Fixes "Works in One App Only"Apps like Discord, OBS, games, and media players can request exclusive control of your audio device. When they do, Windows and every other application is blocked from routing audio to your headphones. The headphones show as detected, but produce no sound for anything else. This is the most common cause of headphones working in one app but not others.
- Press Windows + R, type
mmsys.cpl, press Enter. - On the Playback tab, double-click your headphone device.
- Go to the Advanced tab.
- Uncheck "Allow applications to take exclusive control of this device".
- Uncheck "Give exclusive mode applications priority".
- Click Apply → OK.
Fix 8: Update or Reinstall Your Audio Driver
Essential After Windows UpdateIf your headphones stopped being detected right after a Windows update, this is almost certainly the cause. Major updates — especially Windows 11 24H2 — silently replace your manufacturer's audio driver with Microsoft's generic one. The generic driver is missing the headphone jack detection logic entirely.
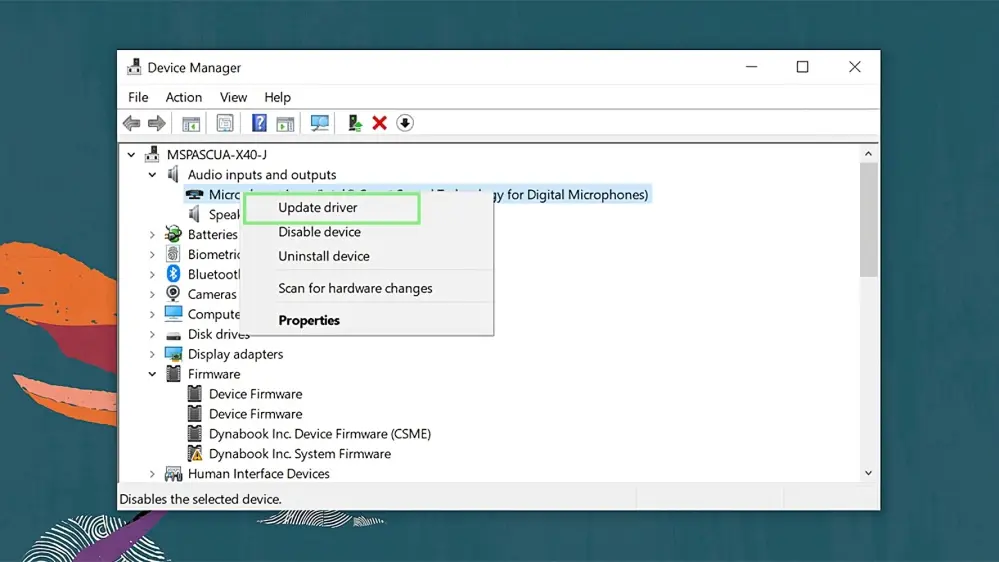
- Press Windows + X → select Device Manager.
- Expand Sound, video and game controllers.
- Right-click your audio device (usually Realtek High Definition Audio, IDT High Definition Audio CODEC, or Intel Smart Sound Technology).
- Select Update driver → Search automatically for drivers.
- Restart once the update completes.
- In Device Manager, right-click the audio device → Uninstall device.
- If prompted, check "Delete the driver software for this device".
- Click Uninstall.
- Restart your PC. Windows installs a fresh driver automatically on reboot.
- Plug in your headphones and test detection.
Fix 9: Configure Jack Detection — Realtek, IDT, and Intel SST
3.5mm Wired HeadphonesOn most Windows systems, the audio chipset's own software controls whether Windows detects a headphone plug-in at all. Without the jack detection popup enabled, Windows never registers the insertion and no output switch happens. This is different from — and separate to — the driver reinstall above.
- Check your system tray for the Realtek HD Audio Manager icon. If not visible, search for "Realtek HD Audio Manager" or "Realtek Audio Console" in Start.
- Open it → go to Connector Settings or Device advanced settings.
- Find "Enable auto popup dialog when device is plugged in" and enable it.
- Confirm Headphone is selected as the device type for the front panel jack.
- Click OK to save.
- Unplug and firmly replug your headphones. Select Headphones in the popup that appears.
Desktop front audio jack not detecting headphones? Try disabling "Enable front panel jack detection" in Realtek Audio Console under Connector Settings. Faulty front-panel wiring on custom desktop builds causes Realtek to continuously misdetect the jack state. Disabling it and using the rear green jack resolves this immediately.
- Search for "IDT Audio Control Panel" or "IDTNC64.cpl" in Start.
- Open it → navigate to Connector Settings or Jack Detection.
- Enable "Auto popup dialog when device is plugged in".
- Click OK, then unplug and replug your headphones.
- If IDT Audio Control Panel is missing, download the IDT driver from HP Support or Dell Support for your exact model.
- Press Windows + X → Device Manager.
- Expand Sound, video and game controllers. Look for Intel Smart Sound Technology Audio Controller.
- Right-click → Update driver → Search automatically.
- Or use the Intel Driver & Support Assistant from intel.com to auto-detect and update all Intel drivers including SST.
- After updating, restart and test headphone detection.
- If jack detection still fails, check your laptop manufacturer's site for an OEM Intel SST driver — the OEM version includes customised jack detection not in Intel's generic driver.
Fix 10: Remove Ghost Audio Devices
Hidden Conflict FixAfter GPU driver installs, USB headset swaps, or Windows feature updates, Windows sometimes keeps leftover ghost device entries that conflict with headphone detection — even when not physically connected. If your headphones "worked yesterday" and nothing obvious changed, this is often why.
- Press Windows + X → Device Manager.
- Click View in the top menu → select Show hidden devices.
- Expand Audio inputs and outputs — greyed-out entries are ghost devices.
- Also expand Sound, video and game controllers and look for greyed-out audio entries.
- Right-click each greyed-out headphone or audio entry → Uninstall device.
- Restart the PC, then replug your headphones.
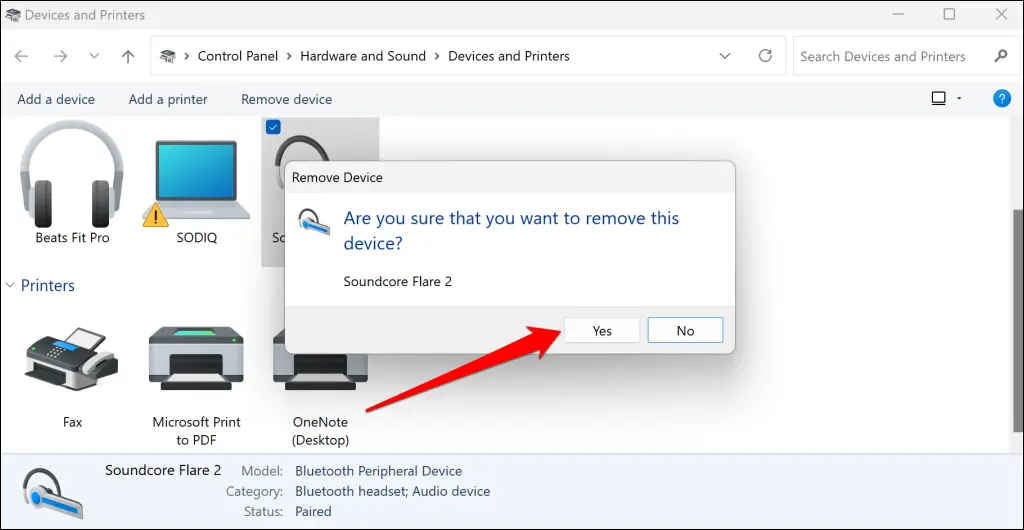
Fix 11: Fix Bluetooth Headphone Detection
Bluetooth OnlyBluetooth headphone detection has its own failure modes. The two most common are a corrupted pairing record and the Bluetooth Support Service being stopped.
- Go to Settings → Bluetooth & devices.
- Find your headphones → click the three-dot menu (···) → Remove device.
- Turn your headphones off. Wait 10 seconds. Turn back on and put into pairing mode.
- Click Add device → Bluetooth and select your headphones.
- After pairing: go to Settings → System → Sound and set the headphones as the output device.
- Press Windows + R → type
services.msc→ press Enter. - Scroll to Bluetooth Support Service.
- If it says Stopped, right-click → Start.
- Right-click → Properties → set Startup type to Automatic → Apply → OK.
Fix 12: Fix USB Headset Not Detected
USB & USB-C HeadsetsUSB headphones create their own audio device in Windows, separate from the built-in sound card. Detection failures have slightly different causes than 3.5mm wired headphones.
- Plug directly into a rear USB port on the PC — not through a hub. Unpowered hubs deliver insufficient power and cause data transfer issues.
- Open Device Manager → expand Sound, video and game controllers. If the USB audio device has a yellow exclamation mark, right-click → Update driver.
- Try a different USB port. A fault in one port is enough to prevent detection.
- Open Device Manager → click View → Show hidden devices. Remove any greyed-out USB audio entries, then restart and replug.
- For USB-C to 3.5mm adapters: confirm the adapter has driver support for your version of Windows — generic adapters without drivers may not be detected at all.
- After detection is confirmed, go to Settings → System → Sound and set the USB headset as the default output device.
Fix 13: Disable Fast Startup (Headphones Stop After Sleep)
Fixes Detection After Sleep or RestartIf headphones work after a fresh boot but stop being detected after waking from sleep, Windows Fast Startup is almost certainly the cause. It partially hibernates the system instead of doing a full shutdown — audio drivers don't reinitialise properly when the PC wakes.
- Open Control Panel → Power Options.
- Click "Choose what the power buttons do".
- Click "Change settings that are currently unavailable".
- Uncheck "Turn on fast startup".
- Click Save changes and do a full restart (not just sleep/wake).
Fix 14: Repair Windows System Files — Last Resort
Advanced — Corrupted Audio StackIf nothing above has worked, corrupted Windows system files may be preventing the audio stack from functioning. This fixes cases where a failed Windows Update damaged core audio files like audiodg.exe or mmdevapi.dll.
- Click Start, type cmd, right-click Command Prompt → Run as administrator.
- Type:
sfc /scannowand press Enter. - Wait for the scan to complete (5–15 minutes). Don't close the window.
- Restart your PC and test headphone detection.
- Open Command Prompt as administrator again.
- Run:
DISM /Online /Cleanup-Image /CheckHealth - Then run:
DISM /Online /Cleanup-Image /RestoreHealth - This requires an internet connection. Allow 10–30 minutes.
- Restart after DISM completes, then reinstall your OEM audio driver from your manufacturer's support page.
Headphones Detected but Sound Is Distorted or Crackling
If Windows detects your headphones but the audio is distorted, crackling, or cutting out, this is a sample rate or configuration issue — not a detection problem in the traditional sense.
- Press Windows + R, type
mmsys.cpl, press Enter. - On the Playback tab, double-click the headphone device.
- Go to the Advanced tab.
- Under Default Format, select 16 bit, 44100 Hz (CD Quality).
- Click Test to confirm audio is clean.
- If that works, try higher settings one step at a time (48000 Hz or 24-bit).
- Click Apply → OK.
Common Problems and Quick Solutions
Match your exact symptom to the right fix:
How to Keep Headphone Detection Working Long-Term
Prevention Checklist — Stop the Problem Coming Back
- After every major Windows update: Check Sound Settings and verify headphones are still the default output. Re-check the Enhancements and Spatial sound tabs — 24H2 updates silently re-enable both.
- For laptops: Bookmark your manufacturer's audio driver page. After every Windows feature update, install the latest OEM driver directly from the manufacturer's support site, not Windows Update.
- Keep the Realtek / IDT / Intel SST audio manager popup enabled so Windows always knows what you plugged in.
- Avoid USB hubs for USB headsets — plug them directly into motherboard ports.
- For Bluetooth users: If detection becomes unreliable, remove and re-pair proactively.
- Set Windows Audio services to Automatic startup in services.msc so they never stay stopped after a crash.
- Disable exclusive mode in your headphone device Properties (Advanced tab) to prevent apps from locking your audio device.
- After GPU driver updates: Check Sound Settings — new GPU installs often set AMD/NVIDIA HDMI audio as the default output. Run Fix 10 (ghost device cleanup) after any GPU driver change.
Quick Reference — Which Fix for Which Problem
| Symptom | Likely Fix | Headphone Type | Difficulty | Time |
|---|---|---|---|---|
| Intermittent / loose connection | Fix 1 — Physical Connection | Wired / USB | Easy | 2 min |
| Headphones detected but no sound | Fix 2 — Set Default Output | All | Easy | 1 min |
| Headphones not listed in Sound Settings | Fix 3 — Show Disabled Devices | Wired / USB | Easy | 2 min |
| All audio broken / service crashed | Fix 4 — Restart Audio Services | All | Easy | 2 min |
| All audio broken, services intact | Fix 5 — Run Audio Troubleshooter | All | Easy | 3 min |
| Broke after Windows 11 24H2 update | Fix 6 — Disable Enhancements | All | Easy | 2 min |
| Works in one app only | Fix 7 — Disable Exclusive Mode | All | Easy | 2 min |
| Stopped working after Windows Update | Fix 8 — Reinstall Audio Driver | Wired / USB | Medium | 10 min |
| No popup when plugging in (Realtek/IDT) | Fix 9 — Jack Detection Settings | 3.5mm Wired | Medium | 5 min |
| After GPU install / USB headset swap | Fix 10 — Remove Ghost Devices | Wired / USB | Easy | 3 min |
| Bluetooth headphones not found | Fix 11 — Remove & Re-pair | Bluetooth | Medium | 5 min |
| USB headset specifically not detected | Fix 12 — USB Headset | USB | Easy | 5 min |
| Stops working after sleep/wake | Fix 13 — Disable Fast Startup | All | Easy | 3 min |
| Nothing works — all fixes failed | Fix 14 — Repair System Files | All | Advanced | 30 min |
Test Your Headphones After Fixing
Once you've applied a fix, take 30 seconds to confirm it worked properly — both channels should play correctly.
- Go to Settings → System → Sound.
- Under Output, click your headphones device to expand it.
- Click Test — you should hear a tone in each ear separately.
- If one ear is silent, the detection issue is resolved but an audio balance problem may be present. Check the balance settings under device Properties.
Free Online Headphone Test — Recommended
For a thorough stereo check, visit MicTest.pro/sound-test. It plays separate audio through your left and right channels independently, so you can confirm:
- Both headphone channels are properly detected by Windows
- Left and right audio is balanced correctly
- No channel mixing or mono-only output

Found this helpful? Share it:
Frequently Asked Questions
The most common questions about headphones not detected in Windows — answered directly based on hands-on testing.
How do I fix headphones not detected in Windows 11?
Press Win+R, type mmsys.cpl, and press Enter. In the Playback tab, right-click on any empty space and select Show Disabled Devices. If your headphones appear greyed out, right-click them, select Enable, then Set as Default Device. This fixes the problem for most users in under 60 seconds. If your headphones still don't appear, restart the Windows Audio service: press Win+R, type services.msc, find Windows Audio, right-click and Restart. If neither works, reinstall your OEM audio driver from your laptop manufacturer's website — Windows 11 24H2 updates frequently overwrite it with a generic version that lacks jack detection.
Why is my computer not detecting my headphones?
In 9 out of 10 cases, the headphones themselves are physically fine. The most common causes are: the wrong default output device is selected, the headphone device is hidden or disabled by Windows (it just disappears silently), the Windows Audio service has crashed, an audio driver was replaced by a Windows update, or audio enhancements are conflicting with headphone output. Test your headphones on a phone first to confirm they work — if they do, the problem is entirely inside Windows and can be fixed without buying anything.
What are the steps to troubleshoot headphone detection issues in Windows?
To troubleshoot headphone detection issues, follow these steps: 1) Check Default Audio Device — go to Settings > System > Sound and select your headphones as the output. 2) Update Audio Drivers — open Device Manager, right-click your audio device and update or roll back drivers as needed. 3) Use the Audio Troubleshooter — go to Settings > System > Troubleshoot > Other troubleshooters and run Playing Audio. 4) Try Different USB Ports — plug USB headphones directly into a rear port on the PC. 5) Check for Windows Updates — go to Settings > Windows Update > Check for updates. These steps should help you resolve headphone detection problems effectively.
Why are my headphones suddenly not detected after a Windows 11 update?
Windows 11 updates — especially 24H2 cumulative updates — replace your manufacturer's Realtek, IDT, or Intel audio driver with a generic Microsoft version that lacks headphone jack detection. These updates also silently re-enable spatial sound enhancements that were previously turned off. The fix is to download the OEM audio driver from your laptop maker's support site (not Windows Update) and reinstall it. Also check Settings → System → Sound → your headphone device Properties → Enhancements tab and set Spatial sound to Off.
What is the fastest way to fix headphones not showing up in Windows Sound Settings?
Press Win+R, type mmsys.cpl, press Enter. Right-click anywhere in the empty area of the Playback tab and enable both Show Disabled Devices and Show Disconnected Devices. Your headphones should reappear greyed out. Right-click them → Enable → Set as Default Device → Apply → OK. This takes under 60 seconds and works on both Windows 10 and Windows 11.
Why do my headphones appear in Device Manager but not in Sound Settings?
Device Manager shows hardware-level recognition, while Sound Settings shows audio endpoint status — these are two completely separate layers. Your headphones can show in Device Manager (recognised by Windows at hardware level) but be disabled at the audio endpoint level, which is why they vanish from Sound Settings. Open mmsys.cpl via Win+R, right-click in the Playback tab, enable Show Disabled Devices, and re-enable the headphone entry there.
How do I fix Bluetooth headphones not appearing in Windows 11 Sound Settings?
Go to Settings → Bluetooth & devices, find your headphones, click the three-dot menu and select Remove device. Power cycle the headphones, put them in pairing mode, and re-add them via Add device → Bluetooth. After pairing, they should appear in Settings → System → Sound. If they still don't appear, check that the Bluetooth Support Service is running — open services.msc, find Bluetooth Support Service, right-click Start, and set Startup type to Automatic.
Can audio enhancements cause headphone detection failure in Windows?
Yes, and this became much more common after Windows 11 24H2. Spatial sound features like Windows Sonic, Dolby Atmos, and DTS can conflict with standard headphone output routing. The 2025–2026 cumulative updates have been confirmed to silently re-enable spatial sound on devices where it was previously disabled. The fix takes 30 seconds: Settings → System → Sound → click your output device → Additional device settings → Enhancements tab → check Disable all enhancements → Apply. Also set Spatial sound to Off in the Spatial sound tab.
What are ghost audio devices and how do I remove them?
Ghost audio devices are leftover device entries from previous GPU driver installs, USB headset swaps, or Windows feature updates. They conflict with headphone detection even though they're not physically connected. To remove them: open Device Manager, click View then Show hidden devices, expand Audio inputs and outputs and Sound, video and game controllers, right-click any greyed-out headphone or audio entries and select Uninstall device, then restart and replug your headphones.
How do I fix headphones that work in some apps but not others?
This is caused by exclusive audio control. Apps like Discord, OBS, games, and media players can lock the audio device for their own use, blocking every other app including Windows system sounds. Open mmsys.cpl, double-click the headphone device, go to the Advanced tab, and uncheck Allow applications to take exclusive control of this device and Give exclusive mode applications priority. Click Apply and OK.
Why do my headphones stop being detected after my PC wakes from sleep?
Windows Fast Startup partially hibernates the system instead of doing a full shutdown — audio drivers don't reinitialise properly when the PC wakes. To fix permanently: open Control Panel → Power Options → Choose what the power buttons do → Change settings that are currently unavailable → uncheck Turn on fast startup → Save changes. For USB headphones, also open Device Manager → USB Root Hub → Properties → Power Management → uncheck Allow the computer to turn off this device to save power.
How do I fix USB headphones not detected in Windows?
Plug the USB headphone directly into a rear USB port on the PC, not through a hub. Open Device Manager and check under Sound, video and game controllers for the USB audio device — update or reinstall its driver if it has a yellow exclamation mark. Try a different USB port, and check for ghost audio devices under View → Show hidden devices. For headphones that disconnect after sleep, open Device Manager → USB Root Hub → Properties → Power Management → uncheck Allow the computer to turn off this device to save power.
Is it safe to uninstall my audio driver in Device Manager?
Yes, completely safe. When you uninstall the audio driver in Device Manager and restart your PC, Windows 11 and Windows 10 automatically reinstall a fresh basic audio driver on the next boot. You won't lose audio capability permanently. After the automatic reinstall, download and install the official OEM audio driver from your laptop or motherboard manufacturer's support page — it includes full headphone jack detection support that the generic Windows driver often lacks.
Why is my headphone audio distorted or crackling even though Windows detects them?
This is usually a sample rate mismatch. Open mmsys.cpl, double-click the headphone device, go to the Advanced tab, and change Default Format to 16 bit, 44100 Hz. Also disable all audio enhancements in the Enhancements tab, and uncheck Allow applications to take exclusive control of this device on the Advanced tab. Enhancement processing (especially spatial sound) is a common cause of crackling, particularly after Windows 11 24H2 updates.
How do I stop Windows updates from breaking headphone detection every time?
After every major Windows feature update, visit your manufacturer's support page and install the official OEM audio driver for your exact model — don't rely on Windows Update's generic version. After every cumulative update, re-check the Enhancements and Spatial sound tabs in your audio device Properties. Set both Windows Audio services to Automatic startup in services.msc so they auto-recover after any crash.
What should I do if none of the fixes work?
Run sfc /scannow in an elevated Command Prompt to repair corrupted Windows system files (Fix 14). If that doesn't help, the most likely remaining cause is a physically damaged headphone jack. The simplest permanent fix is a USB-to-3.5mm audio adapter — it costs under $10, bypasses the built-in jack entirely, creates a brand new USB audio device that Windows detects immediately, and requires no driver installation on Windows 10 or 11.
- 1Check Physical Connection
- 2Set as Default Output Device
- 3Show Disabled Devices
- 4Restart Audio Services
- 5Run Audio Troubleshooter
- 6Disable Enhancements (24H2)
- 7Disable Exclusive Mode
- 8Update / Reinstall Audio Driver
- 9Jack Detection (Realtek/IDT/Intel)
- 10Remove Ghost Audio Devices
- 11Re-pair Bluetooth Headphones
- 12USB Headset Fix
- 13Disable Fast Startup
- 14Repair System Files
Test Your Headphones Online
Play left and right audio separately to confirm both channels are detected and working. Free, no install, works in all browsers.
Open Free Sound Test Test Your Microphone- 3.5mm wired (Realtek): Fixes 3, 8, 9, 10
- 3.5mm wired (IDT/Intel): Fixes 8, 9, 10
- USB headset: Fixes 1, 3, 8, 12
- Bluetooth: Fix 11
- After Windows Update: Fixes 6 then 8
- Not listed in Output: Fix 3
- All audio broken: Fix 4
- Works in 1 app only: Fix 7 (Exclusive Mode)
- After sleep/wake: Fix 13
- Windows 11 24H2: Fix 6
- After GPU install: Fix 10
- Distorted audio: Distorted section
Useful Windows Shortcuts
- Win + R then
mmsys.cpl→ Sound Control Panel - Win + R then
services.msc→ Services - Win + X → Device Manager shortcut
- Win + I → Settings (for Sound Settings)