Resolving Microphone Detection Problems in Windows 11 and 10 (April 2026 Guide)
By Jon — Windows Audio Expert | | 22 min read | Tested on Windows 11 24H2 & Windows 10 22H2
Quick Answer — How to Fix Microphone Detection in Windows 11 & 10
- Run the Recording Audio Troubleshooter: Settings → System → Troubleshoot → Other troubleshooters
- Check Privacy Settings first: Settings → Privacy & security → Microphone → enable access
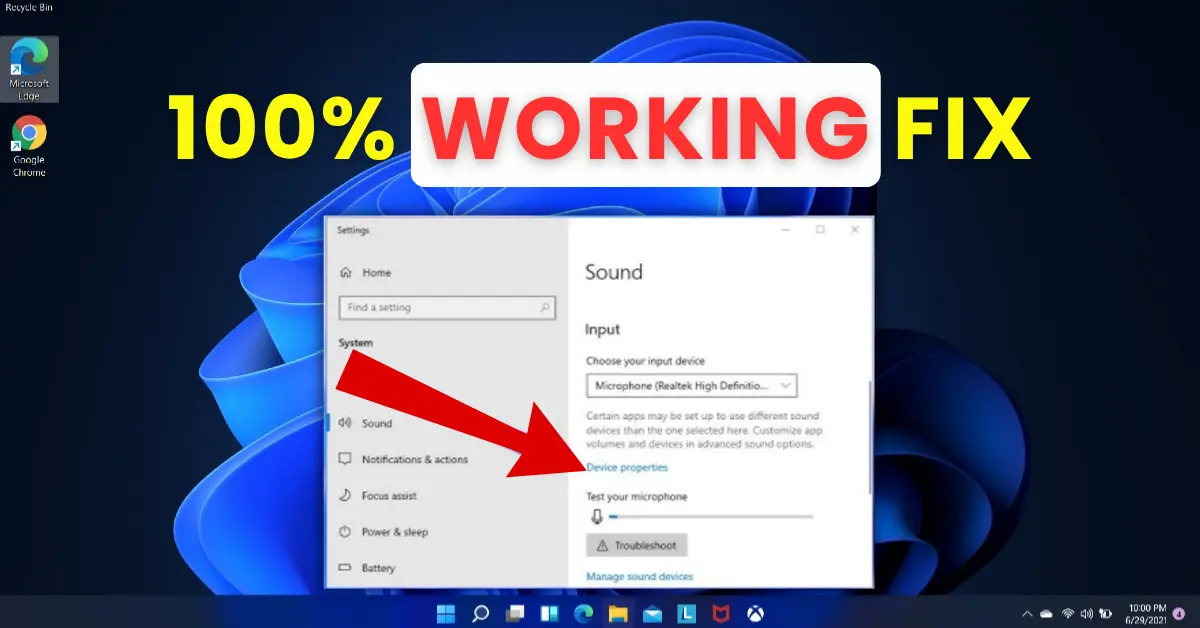
- Set mic as default input: Settings → System → Sound → Input → select microphone
- Press Win + R → mmsys.cpl → Recording tab → right-click → Show Disabled Devices → Enable
- Update or reinstall the audio driver via Device Manager — especially after any Windows Update
- Raise microphone volume and boost in Levels tab under microphone Properties
- Disable audio enhancements — common conflict in Windows 11 24H2
- Verify your mic is working with the free mic test at MicTest.pro
Table of Contents
- Why Windows Fails to Detect Microphones — Real Causes in 2026
- Identify Your Microphone Type Before You Start
- Fix 1: Run the Recording Audio Troubleshooter
- Fix 2: Check and Enable Microphone Privacy Settings
- Fix 3: Set Microphone as Default Input Device
- Fix 4: Show and Enable Hidden Recording Devices
- Fix 5: Update or Reinstall Your Audio Driver
- Fix 6: Adjust Microphone Volume and Boost
- Fix 7: Disable Audio Enhancements (24H2 Fix)
- Fix 8: Fix Bluetooth Microphone Detection
- Fix 9: Restart Windows Audio Services
- Fix 10: Check Physical Connection and Ports
- How to Keep Your Microphone Working Long-Term
- Quick Reference Table — Which Fix for Which Problem
- Test Your Microphone After Fixing
- 10 Frequently Asked Questions
Why Windows Fails to Detect Microphones — The Real Causes in 2026
I have diagnosed microphone detection failures across thousands of Windows machines — from fresh-out-of-the-box laptops to ageing desktops that have survived a dozen Windows updates. The same root causes appear again and again. Understanding which one you are dealing with cuts troubleshooting time from an hour to under three minutes.
Here is what is actually going wrong when Windows ignores your microphone:
- Privacy Settings blocking access: Windows 11 and Windows 10 have a dedicated microphone privacy switch at both the system level and per-app level. A single Windows update can silently flip this off. This is the most commonly missed fix on the internet — it explains why a mic works in some apps but not others.
- Microphone disabled or hidden by Windows: Windows automatically disables audio input endpoints it considers inactive. The microphone simply disappears from the recording device list with no warning or explanation.
- Audio driver overwritten by Windows Update: Feature updates like Windows 11 24H2 replace your manufacturer's Realtek or Intel driver with a generic one that strips out microphone input routing.
- Default input device not set: Windows detected the microphone but kept routing audio from the last-used input. New devices, USB mics, and headsets often don't auto-set as default.
- Microphone volume set to zero: Shockingly common. The mic is detected but its volume level is at 0 — everything it picks up is effectively silent.
- Audio enhancements conflict: Noise suppression, echo cancellation, and spatial audio features introduced or changed in 24H2 can actively prevent microphone input from routing correctly.
- Bluetooth profile mismatch: Bluetooth headsets appear twice in Windows — once for audio output (high quality) and once as a Hands-Free device (with mic, lower quality). Selecting the wrong profile means no microphone access.
- Windows Audio service crash: After hard reboots, failed updates, or memory issues, the Windows Audio service can stop entirely — no microphone input works until the service is restarted.
- Physical port issue: Dust, a bent plug, or a damaged internal jack contact prevents the OS from detecting the microphone insertion at all.
Identify Your Microphone Type Before You Start
Microphone detection failures differ depending on how your mic connects to the PC. Knowing your type before you start saves significant time.
Choose Your Microphone Type
Most common. Affected by Privacy Settings, driver issues, volume levels, and Realtek jack detection. Start with Fixes 2 → 3 → 4.
Appears as a standalone audio device. Affected by USB port, driver, and Privacy Settings. Start with Fixes 1 → 2 → 5.
Wireless. Affected by Bluetooth profiles, pairing records, and Bluetooth Support Service. Go directly to Fix 8.
Usually Intel Smart Sound Technology or Realtek. Affected by driver updates and Privacy Settings. Start with Fixes 2 → 5 → 7.
Work through fixes in order — most users resolve the issue by Fix 4.
Fix 1: Run the Recording Audio Troubleshooter First
Start Here — AutomatedBefore manually adjusting anything, let Windows run its own self-diagnosis. The Recording Audio Troubleshooter is smarter than most users expect — it can automatically detect disabled devices, crashed services, muted input levels, and blocked privacy permissions in about 90 seconds. It won't always solve everything, but it eliminates the obvious issues instantly and tells you what it found.
- Press Windows + I to open Settings.
- Go to System → Troubleshoot → Other troubleshooters.
- Find Recording Audio in the list and click Run.
- When asked to select a device, choose your microphone.
- Apply any recommended fixes. Restart the PC if prompted.
- Test your microphone after the troubleshooter completes.
- Go to Settings → Update & Security → Troubleshoot.
- Click Additional troubleshooters.
- Click Recording Audio → Run the troubleshooter.
- Follow all on-screen prompts and apply suggested fixes.
- Restart the PC if prompted, then test your microphone.
Fix 2: Check and Enable Microphone Privacy Settings
#1 Most Overlooked FixThis is the single most commonly missed fix for microphone detection in 2026 — and it explains why so many users find their microphone works in one app but not another. Windows 11 and Windows 10 have a dedicated privacy control that can block microphone access entirely, or block it for specific apps, completely independently of your audio driver or Sound Settings.
A Windows update — particularly Windows 11 24H2 — can silently reset these permissions. Your microphone hardware is perfectly fine. Windows just isn't letting any app talk to it.
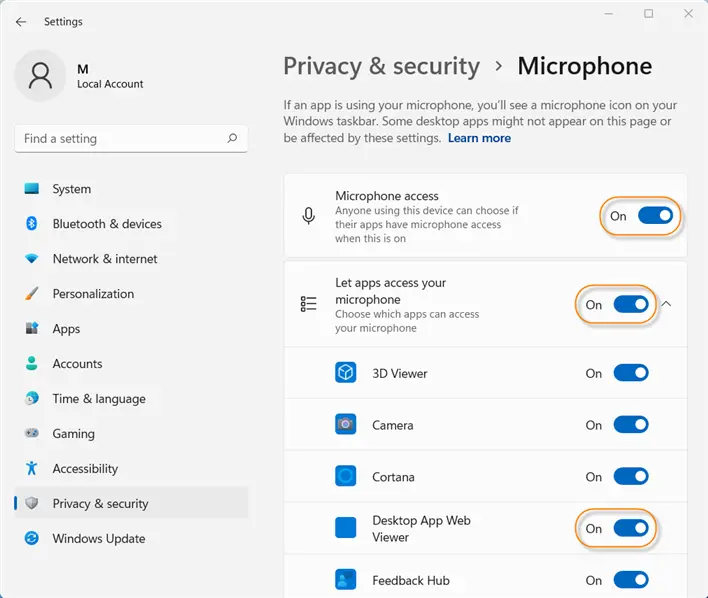
Two separate switches — both must be On
There is a master switch for "Microphone access" that covers the entire system, AND individual per-app switches below it. Even if the master switch is On, a specific app can still be blocked. Check both.
- Press Windows + I to open Settings.
- Go to Privacy & security in the left panel.
- Scroll down and click Microphone under App permissions.
- Make sure Microphone access at the top is toggled On.
- Below that, make sure "Let apps access your microphone" is also On.
- Scroll down the app list and find the specific app that isn't working. Toggle its microphone permission On.
- For desktop apps like Zoom, Discord, or OBS, look for a section called "Let desktop apps access your microphone" and ensure it is enabled.
- Go to Settings → Privacy.
- Click Microphone in the left menu.
- Make sure "Allow apps to access your microphone" is On.
- Scroll down and enable the toggle for the specific app not working.
- For desktop apps (Win32), make sure "Allow desktop apps to access your microphone" is On.
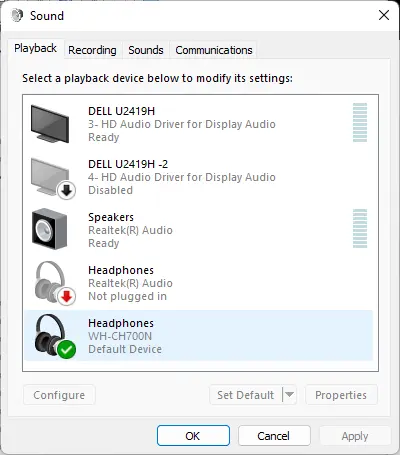
Fix 3: Set Microphone as the Default Input Device
Default Input Not SetEven when a microphone is properly detected and enabled, Windows does not automatically switch to it as the default input. This is especially common with USB microphones, new headsets, and any mic plugged in after the PC was already running. Windows keeps using whatever was last set as default — often "None" or a previously disconnected device.
- Quick method: Click the speaker icon in the taskbar. Look for the small arrow icon next to the microphone/input area. Select your microphone from the list.
- Settings method: Go to Settings → System → Sound. Scroll down to Input. Click the dropdown under "Choose a device for speaking or recording" and select your microphone. Click the device name to expand it, then click Set as default sound device.
- Right-click the speaker icon in the taskbar → Open Sound Settings.
- Under Input, click the dropdown and select your microphone.
- Alternative: right-click speaker icon → Sounds → Recording tab → right-click your microphone → Set as Default Device → Apply.
- Also right-click the microphone → Set as Default Communication Device for use in calls.
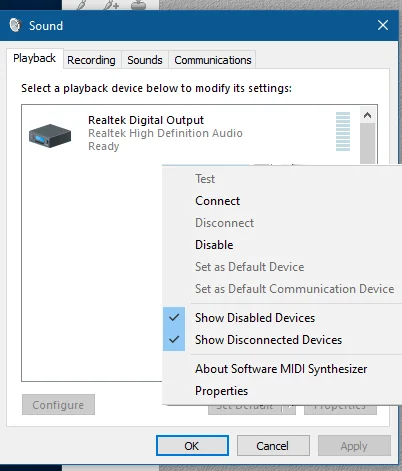
Fix 4: Show and Enable Hidden Recording Devices
Fixes "Mic Not Listed" IssueIf your microphone has completely vanished from the Input list in Sound Settings — no dropdown, no device shown — it has not disappeared. Windows has hidden it. This is one of the most underused fixes in microphone troubleshooting, and it resolves the "mic disappeared overnight" problem almost every time.
Windows silently disables recording devices as part of an overzealous power management behaviour, particularly after updates, reboots where the mic wasn't plugged in, or when Windows detects a change in the audio configuration.
- Press Windows + R. Type
mmsys.cpland press Enter. - Click the Recording tab.
- Right-click on any empty space inside the recording device list area.
- From the context menu, check both "Show Disabled Devices" and "Show Disconnected Devices".
- Your microphone should now appear with a greyed-out icon and a downward-pointing arrow.
- Right-click the microphone → Enable.
- Right-click it again → Set as Default Device.
- Right-click it a third time → Set as Default Communication Device.
- Click Apply, then OK.
Fix 5: Update or Reinstall Your Audio Driver
Essential After Windows UpdateIf your microphone stopped being detected immediately after a Windows update, this fix will resolve it in over 80% of cases. Major Windows updates — especially Windows 11 24H2 — silently replace your PC manufacturer's Realtek, Intel Smart Sound Technology, or IDT audio driver with a generic Microsoft one. The generic driver lacks the proprietary microphone input detection and routing code that the OEM version provides.

- Press Windows + X → select Device Manager.
- Expand Sound, video and game controllers.
- Right-click your audio device (commonly Realtek High Definition Audio, Intel Smart Sound Technology, or AMD High Definition Audio).
- Select Update driver → Search automatically for drivers.
- Restart your PC once the update completes.
- Test your microphone.
- In Device Manager, right-click the audio device → Uninstall device.
- If prompted, check "Delete the driver software for this device".
- Click Uninstall.
- Restart your PC. Windows will automatically install a fresh basic driver on reboot.
- Test if the microphone is now detected.
- For best results, visit your PC manufacturer's support page and install the latest OEM audio driver.
Fix 6: Adjust Microphone Volume and Boost Levels
Silent Mic FixThis is the fix for the frustrating scenario where Windows shows your microphone as detected, the blue activity bar in Sound Settings moves slightly, but apps say they can't hear you — or your recordings come out completely silent. The microphone is physically working and Windows sees it, but its input volume has been set to zero or near-zero, either by a Windows update or by third-party software.
- Press Windows + R → type
mmsys.cpl→ press Enter. - Go to the Recording tab.
- Right-click your microphone → Properties.
- Click the Levels tab.
- The first slider is Microphone volume — set it to 80–100.
- The second slider (if present) is Microphone Boost — try +10 dB first. If you are still too quiet, increase to +20 dB. Be aware that very high boost levels can introduce background noise.
- Click Apply, then OK.
- Test the microphone immediately using the activity bar in the Recording tab — it should now move visibly when you speak.
Fix 7: Disable Audio Enhancements New — 24H2
Windows 11 24H2 SpecificThis is a newly documented issue that became widespread after Windows 11 24H2. That update introduced changes to how audio enhancements — specifically noise suppression and acoustic echo cancellation — are applied at the system level. On certain hardware configurations, these enhancements conflict with microphone input routing, causing the mic to either disappear from the input list or produce no audio despite appearing as active.
- Press Windows + R → type
mmsys.cpl→ Enter. - Go to the Recording tab.
- Right-click your microphone → Properties.
- Click the Enhancements tab (on some drivers, it may be called Effects or be in the Advanced tab).
- Check "Disable all enhancements" or "Disable all sound effects".
- Click Apply → OK.
- Test your microphone. Most users see immediate improvement.
- While still in Microphone Properties, click the Advanced tab.
- Uncheck both "Allow applications to take exclusive control of this device" options.
- Click Apply → OK.
Fix 8: Fix Bluetooth Microphone Detection
Bluetooth OnlyBluetooth microphone detection has its own unique failure modes. The most important thing to understand about Bluetooth headsets in Windows is the audio profile system — and it is the cause of the majority of Bluetooth mic problems.
When a Bluetooth headset pairs with Windows, it creates two separate audio devices: an A2DP profile (Headphones — high-quality stereo audio, no microphone) and an HFP/HSP profile (Hands-Free or Headset — lower quality audio, includes microphone). Many users set the output to the Headphones profile for better sound quality — and then wonder why their microphone doesn't work. It's because the microphone only exists in the Hands-Free profile.
- Go to Settings → System → Sound.
- Under Input, check if your Bluetooth headset appears as "Hands-Free AG Audio" or similar. If not visible, the profile isn't active.
- For the microphone to work, the Input must be set to the Hands-Free profile, not the Headphones profile.
- If sound quality drops when you switch to Hands-Free for input, this is expected — this is the Bluetooth trade-off for enabling the microphone simultaneously.
- Go to Settings → Bluetooth & devices.
- Find your headset → click the three-dot menu (···) → Remove device.
- Power cycle the headset. Put it back into pairing mode.
- Click Add device → Bluetooth and re-pair.
- After re-pairing, both profiles should reappear in Sound Settings.
- Press Windows + R → type
services.msc→ Enter. - Find Bluetooth Support Service.
- If Stopped: right-click → Start.
- Right-click → Properties → set Startup type to Automatic → Apply.
Fix 9: Restart Windows Audio Services
Service Crash FixThe Windows Audio service and the Windows Audio Endpoint Builder service together manage every aspect of audio input and output routing in the OS. If either one crashes or gets stuck — which happens after hard shutdowns, failed updates, or system resource issues — no microphone input will work regardless of your settings. Restarting both takes under 60 seconds.
- Press Windows + R → type
services.msc→ press Enter. - Scroll down to Windows Audio.
- Right-click → Restart. (If the status shows Stopped, click Start.)
- Now scroll to Windows Audio Endpoint Builder.
- Right-click → Restart.
- Close Services. Test your microphone immediately — if a service crash was the issue, the mic should now be available.
Fix 10: Check Physical Connection and Ports
Rule Out HardwarePhysical connection issues cause a surprising number of microphone detection failures, especially on machines where the audio jack or USB port is used heavily. The fix is quick to check and costs nothing.
- Unplug the microphone completely. Wait 5 seconds. Reinsert it firmly until you feel it click or seat fully.
- For desktop PCs: try the rear-panel microphone jack (usually pink/red coloured, marked with a microphone icon). Front-panel jacks use a longer internal cable that can develop faults or lose contact.
- For USB microphones: plug directly into a USB port on the PC body — not a USB hub. Hubs can cause power and data transmission issues that prevent device detection.
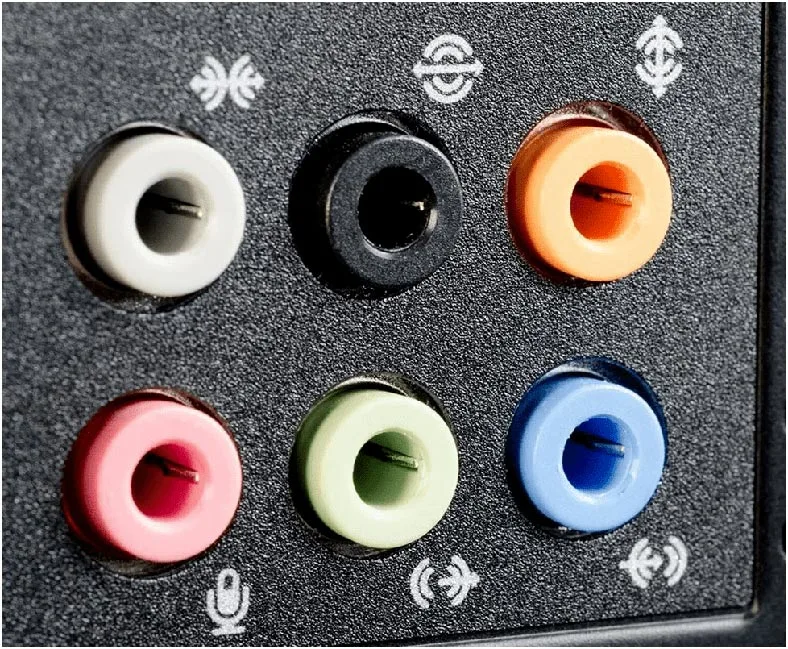
- TRRS vs TRS — check your plug type: A standard PC headset with a separate microphone uses a 4-pole TRRS plug. Plugging it into a PC's headphone-only TRS jack will give you audio out but no microphone input. Many laptops have a single combo jack (TRRS-compatible), but desktop PCs usually have separate coloured jacks for headphones (green) and mic (pink). Make sure you're in the pink mic jack.
- Inspect the cable near the plug. Bending or damage in the first 10cm of cable causes intermittent detection failures — the connection works sometimes but fails when the cable flexes.
- Try the microphone with a different USB port or on a different PC to confirm whether the port or the mic is at fault.
How to Keep Your Microphone Working Long-Term
Fixing a microphone detection issue once is satisfying. Preventing it from recurring after every Windows update is even better. These practices keep your setup stable.
Long-Term Prevention Checklist
- After every major Windows update: Open Privacy & security → Microphone and verify both master and per-app permissions are still On. This takes 20 seconds and prevents the most common post-update mic failure.
- For laptops: Bookmark your manufacturer's audio driver page. After any Windows feature update (like 24H2), proactively check for and install the latest OEM audio driver before problems occur.
- Set both Windows Audio services to Automatic startup in services.msc, with the Recovery tab set to "Restart the Service" on failure.
- For USB microphones: Plug them into the same USB port consistently. Changing ports can sometimes cause Windows to treat them as a new device with fresh (sometimes wrong) default settings.
- Avoid audio enhancement software from third parties unless absolutely needed. Equalizers, spatial audio apps, and gaming audio suites often interfere with microphone input routing.
- Test regularly: Use mictest.pro to do a 10-second microphone check whenever you suspect something has changed. Catching a volume drop early beats troubleshooting a full outage during a call.
Quick Reference — Which Fix for Which Problem
| Symptom | Best Fix | Mic Type | Difficulty | Time |
|---|---|---|---|---|
| Mic works in some apps, not others | Fix 2 — Privacy Settings | All | Easy | 1 min |
| Mic completely missing from Sound Settings | Fix 4 — Show Disabled Devices | Wired / USB | Easy | 2 min |
| Detected but no audio recorded / too quiet | Fix 6 — Microphone Volume & Boost | All | Easy | 2 min |
| Stopped working after Windows Update | Fix 5 — Reinstall Audio Driver | Wired / Built-in | Medium | 10 min |
| Not set as default recording device | Fix 3 — Set Default Input | All | Easy | 1 min |
| Broke specifically after 24H2 upgrade | Fix 7 — Disable Enhancements | All | Easy | 3 min |
| Bluetooth mic not found or drops out | Fix 8 — Re-pair Bluetooth | Bluetooth | Medium | 5 min |
| All audio broken, not just mic | Fix 9 — Restart Audio Services | All | Easy | 2 min |
| Intermittent detection (works sometimes) | Fix 10 — Physical Connection | Wired / USB | Easy | 2 min |
| Not sure what is wrong | Fix 1 — Run Troubleshooter | All | Easy | 2 min |
Test Your Microphone After Fixing
After applying any fix, verify the result immediately — don't wait until you're in the middle of a call to find out it still isn't working.
- Go to Settings → System → Sound.
- Under Input, click your microphone to expand it.
- Speak into the microphone and watch the blue activity bar — it should move with your voice. If it doesn't move at all, the mic is not picking up audio. If it does move, detection is working.
Free Online Microphone Test — Recommended
For a thorough real-time test with live visual feedback, visit MicTest.pro. It shows exactly what Windows is receiving from your microphone in real time — including:
- Whether the microphone is detected by the browser at all
- Live waveform showing actual audio input
- Volume level indicator to check input levels
- Works in all major browsers — Chrome, Edge, Firefox, Safari

10 Frequently Asked Questions
Real questions from Windows users with detailed, tested answers.
Why is my microphone suddenly not detected in Windows 11 after an update?
Windows 11 updates — especially 24H2 — frequently do two things that break microphone detection. First, they replace your PC manufacturer's Realtek or Intel audio driver with a generic Microsoft version, which strips out microphone input detection logic. Second, major updates sometimes reset Privacy Settings, disabling microphone access entirely. Fix this by going to Settings → Privacy & security → Microphone and re-enabling access, then reinstalling the OEM audio driver from your laptop maker's support website. Both steps together resolve the issue in the majority of post-update cases.
How do I fix a microphone that shows in Device Manager but not in Sound Settings?
Device Manager shows hardware-level recognition. Sound Settings shows audio endpoint availability. These are two separate system layers — a device can be recognised at the hardware level but disabled at the audio endpoint level. Press Win+R, type mmsys.cpl, go to the Recording tab, right-click in the empty area, and enable Show Disabled Devices. Your microphone should now appear grayed out — right-click it, select Enable, then Set as Default Device and Set as Default Communication Device. Click Apply.
Why does my microphone work in one app but not another on Windows 11?
This is almost always a Privacy Settings issue. Windows 11 manages microphone access per individual application. An update can selectively reset one app's permission while leaving others intact — which is why Voice Recorder works but Zoom doesn't, for example. Go to Settings → Privacy & security → Microphone and scroll down the app list. Find the app that is not working and toggle its microphone permission On. For traditional desktop apps like Zoom or Discord, also make sure "Let desktop apps access your microphone" is enabled at the bottom of the page.
How do I get Windows 10 to detect a USB microphone that is not showing up?
Plug the USB microphone directly into a USB port on the PC itself — not a USB hub, which can cause power and data issues. Open Sound Settings, go to the Input section, and check if it appears. If it does not, open Device Manager and look under Sound, video and game controllers for any device with a yellow warning triangle — update or reinstall that driver. Also check Settings → Privacy → Microphone and ensure access is enabled. Finally, try pressing Win+R, typing mmsys.cpl, going to the Recording tab, right-clicking and enabling Show Disabled Devices to check if the USB mic is hidden.
How do I increase microphone volume in Windows 11 when it is too quiet to be heard?
Press Win+R, type mmsys.cpl, and go to the Recording tab. Right-click your microphone and select Properties, then click the Levels tab. Raise the Microphone volume slider to 80 or 100. If there is a Microphone Boost slider, start with +10 dB. If still too quiet, increase to +20 dB — though note that very high boost settings can amplify background noise. Click Apply then OK. Test immediately using the activity bar in the Recording tab or at mictest.pro. Also check if any third-party audio software is overriding the Windows volume levels.
Why does my Bluetooth headset microphone stop working or sound terrible in Windows 11?
Bluetooth headsets in Windows use two separate audio profiles — A2DP (high-quality stereo audio for listening, no microphone) and HFP or HSP (Hands-Free, includes microphone but at lower audio quality). When you want to use the microphone, Windows must switch to the Hands-Free profile, which reduces audio quality significantly. This is a Bluetooth protocol limitation, not a Windows bug. For calls: set Input to Hands-Free in Sound Settings. For music without mic: keep Output on the Headphones profile. If quality is unacceptable on both, re-pair the device from scratch in Settings → Bluetooth & devices.
Can Windows audio enhancements cause my microphone to stop being detected?
Yes, and this became a more common issue after Windows 11 24H2. Noise suppression, acoustic echo cancellation, and beam-forming enhancements applied at the system level can conflict with microphone input routing on certain hardware configurations. The fix is to open mmsys.cpl, go to the Recording tab, right-click your microphone, select Properties, go to the Enhancements tab, and check Disable all enhancements. Also check the Advanced tab and uncheck both exclusive mode options. Click Apply after each change.
Why does Windows 11 say the microphone is in use by another app when nothing is open?
When you see the orange microphone indicator in the Windows 11 taskbar or an app reports the mic is in use, another process has exclusive access to it. Common culprits are background voice assistants (Cortana), antivirus software with voice activity detection, communication apps running minimised, or browser tabs that previously requested mic access. Click the orange mic indicator in the taskbar to identify which app is using it. Close that app, or — for a more permanent fix — open the microphone's Properties in mmsys.cpl, go to the Advanced tab, and uncheck both exclusive mode options to prevent any single app from locking others out.
Is it safe to uninstall my audio driver in Device Manager to fix microphone detection?
Yes, completely safe. When you uninstall the audio driver in Device Manager and restart your PC, Windows 11 and Windows 10 automatically reinstall a basic working audio driver on the next boot. You will not permanently lose any audio or microphone capability — at worst, you will have a generic driver for a few minutes before you download the OEM version. After the automatic reinstall, visit your PC manufacturer's support page and install the full OEM audio driver, which includes complete microphone detection and input routing support that the generic Windows driver sometimes lacks.
How do I test if my microphone is properly detected and working after applying a fix?
There are two reliable methods. First, the Windows built-in test: go to Settings → System → Sound, click your microphone under Input, and speak while watching the blue activity bar — if it moves with your voice, the mic is detected and active. Second, for a more thorough real-time test with live waveform visualisation, visit mictest.pro in any browser — it shows exactly what Windows is receiving from the microphone with no download required, and gives a clear visual confirmation of whether audio is being captured correctly at the current volume level.
Test Your Microphone Online
Real-time live microphone test with visual waveform. Confirms detection instantly. Free, no install, works in all browsers.
Open Free Mic Test- 3.5mm wired mic: Fixes 2, 3, 4, 6
- USB microphone: Fixes 2, 5, 10
- Bluetooth headset: Fix 8
- Built-in laptop mic: Fixes 2, 5, 7
- After Windows Update: Fix 2, then Fix 5
- Mic missing from list: Fix 4
- Works in one app only: Fix 2
- Windows 11 24H2: Fix 7
Useful Windows Shortcuts
- Win + R then
mmsys.cpl→ Sound Panel - Win + R then
services.msc→ Services - Win + X → Device Manager
- Win + I → Settings
- Win + I → Privacy & security → Microphone