How to Screenshot on Windows 10 and 11 — Every Method That Actually Works (2026 Guide)
By Jon — Windows Productivity & Troubleshooting Writer | | 18 min read
Quick Answer — How to Screenshot on Windows
- Best all-around shortcut: Windows + Shift + S — opens Snipping Tool overlay, drag to select any area, auto-copies to clipboard
- Full screen, auto-saved: Windows + Print Screen — saves PNG directly to Pictures > Screenshots
- Quick clipboard copy: Print Screen (PrtSc) — copies whole screen, paste into Paint or any app
- Active window only: Alt + Print Screen — copies just the window you're in
- Snipping Tool app: Search "Snipping Tool" in Start — use for timed/delayed screenshots and annotations
- Gaming screenshots: Windows + Alt + PrtSc via Game Bar — saves to Videos > Captures
- No Print Screen key? Windows + Shift + S always works, on every keyboard layout
Table of Contents
- All Screenshot Shortcuts at a Glance
- Method 1: Print Screen Key (PrtSc) — The Classic
- Method 2: Win + Shift + S — The One You'll Use Most
- Method 3: Snipping Tool App — For Annotations & Delays
- Method 4: Alt + Print Screen — One Window Only
- Method 5: Win + Print Screen — Auto-Save to Folder
- Method 6: Xbox Game Bar — For Gamers
- Where Do Screenshots Save in Windows?
- Screenshots on Specific Devices: HP, Dell, Surface, Laptop
- How to Take a Timed or Delayed Screenshot
- How to Take a Scrolling / Full-Page Screenshot
- Which Screenshot Method Should You Use? (Quick Table)
- Screenshot Not Working? Fixes That Actually Help
- 10 Frequently Asked Questions
All Windows Screenshot Shortcuts at a Glance
Before going deep on each method, here is the full map. Bookmark this or pin it somewhere — once it clicks, you will never fumble through menus looking for a screenshot tool again.
Method 1: Print Screen Key (PrtSc) — The Classic Way
Print ScreenThe Print Screen key has been on keyboards since the DOS era. It still works in 2026 — just not the way most people expect. It does not save a file. It copies your screenshot to the clipboard silently. No flash, no notification, no file. That is why so many people press it and think nothing happened.
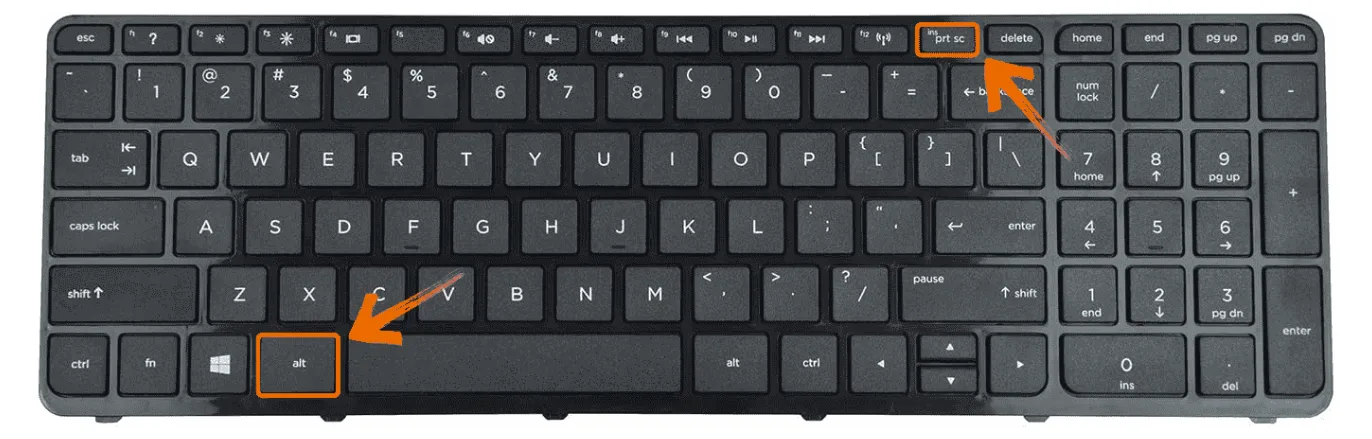
- Press the Print Screen key on your keyboard. It may be labelled PrtSc, PrtScn, Print Scr, or occasionally just a camera icon. It is almost always on the top row, just right of F12.
- Nothing visible happens — but your entire screen is now copied to the clipboard.
- Open Microsoft Paint (search for it in Start), then press Ctrl + V to paste.
- Click File → Save As, choose PNG or JPEG, give it a name, and save it wherever you like.
PrtSc shines when you need to grab something fast and paste it directly into another application — an email, a Word document, a Teams chat, or a Slack message. You skip the whole "save as file" step. Press PrtSc, switch to your destination app, hit Ctrl+V, and the screenshot appears inline. For that workflow, it is the fastest option in Windows.
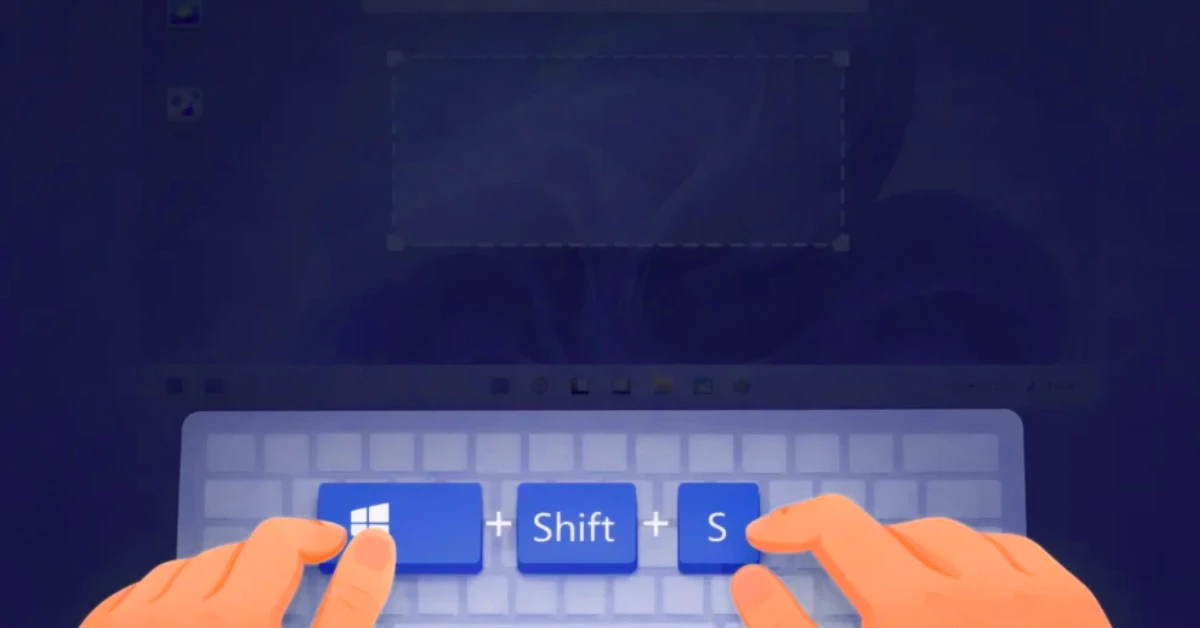
Method 2: Windows + Shift + S — The One You Will Use for Everything
Recommended for Most PeopleThis is the screenshot shortcut most Windows users eventually settle on once they discover it. It is flexible, fast, gives you immediate editing access, and works on every device. If you only memorise one screenshot method from this entire guide, make it this one.
On Windows 10, this opens the old Snip & Sketch tool. On Windows 11, it opens the updated Snipping Tool directly. They behave almost identically — the key combination is the same.
- Press Windows + Shift + S at the same time.
- Your screen will dim slightly and a small toolbar appears at the top centre with four icons. From left to right:
- Rectangle snip — drag a box around any area of the screen (most used)
- Freeform snip — draw any shape with your mouse to capture an irregular area
- Window snip — click on any open window to capture just that window
- Full-screen snip — instantly captures the entire screen
- After selecting your snip type and making your selection, the screenshot is automatically copied to your clipboard.
- A small thumbnail notification appears in the bottom-right corner of your screen. Click it to open the Snipping Tool editor where you can annotate, crop, and save.
- If you just need it on the clipboard (to paste into an email or chat), ignore the notification — it is already there. Press Ctrl + V in your destination app.
Method 3: The Snipping Tool App — Your Go-To for Annotations and Delays
Snipping ToolThe Snipping Tool is the app behind the Win+Shift+S shortcut — but opening it directly from the Start menu gives you access to features you cannot get through the keyboard shortcut alone. Specifically: timed/delayed screenshots and, on Windows 11, screen recording.
On Windows 11, the Snipping Tool is a full-featured capture suite that Microsoft has been actively improving with each update. On Windows 10, you might have both the older "Snipping Tool" and "Snip & Sketch" — they both do essentially the same thing. The newer Snip & Sketch (accessible via Win+Shift+S) is the one Microsoft actively maintains.
- Click the Start menu and type "Snipping Tool". Click the app when it appears.
- The Snipping Tool window opens. Click New to start a new snip immediately (or use the snip type dropdown to change the capture mode).
- For a delayed screenshot, click the clock icon (stopwatch) before clicking New. Choose a 3, 5, or 10-second delay. This gives you time to open a menu, hover over an item, or position things exactly how you want them before the capture fires.
- After capturing, the screenshot opens in the editor. Use the toolbar to crop, annotate with pen or highlighter, add text, or just click the floppy disk icon to save.
- You can also copy it to clipboard with Ctrl + C directly from the editor.
Method 4: Alt + Print Screen — Capture Just the Active Window
Active WindowThis one is underrated. When you only want to capture one specific window — a settings panel, a browser window, an error dialog — Alt + Print Screen grabs just that window and ignores everything else on the screen. No cropping needed.
- Click on the window you want to capture to make sure it is the active (focused) window.
- Press Alt + Print Screen.
- The window is silently copied to your clipboard. Nothing else is included — no taskbar, no other apps, no background.
- Open Paint (or any image editor, Word document, email, etc.) and press Ctrl + V to paste and save.
Method 5: Windows + Print Screen — Full Screen, Auto-Saved Instantly
Auto-SaveIf you take a lot of full-screen screenshots and do not want to deal with paste-and-save every single time, this is the shortcut for you. One keypress and a PNG file appears in your folder automatically. Clean, simple, reliable.
- Press Windows + Print Screen (Windows key and PrtSc at the same time).
- Your screen will briefly dim for about half a second — that is the visual confirmation that a screenshot was taken.
- Open File Explorer and navigate to This PC → Pictures → Screenshots.
- Your screenshot is there, named Screenshot (1).png, Screenshot (2).png, and so on — automatically numbered in order.
Method 6: Xbox Game Bar — Designed for Gamers, Works for Everyone
Game BarThe Xbox Game Bar is Microsoft's built-in gaming overlay for Windows 10 and 11. Beyond game recording and performance monitoring, it has a screenshot function that is specifically useful for capturing full-screen games — situations where other screenshot methods sometimes fail or only capture a black screen.
- Quick screenshot shortcut: Press Windows + Alt + Print Screen from anywhere (you do not need to open the overlay). Your screenshot is saved automatically to Videos > Captures.
- Full overlay: Press Windows + G to open the Game Bar overlay. In the Capture widget (looks like a camera/film panel), click the camera icon to take a screenshot.
Where Do Screenshots Save on Windows? The Complete Breakdown
This is probably the most-Googled follow-up question after taking a screenshot. The answer depends entirely on which method you used. Here is the full picture:
| Method Used | Where It Goes | Auto-Saved? |
|---|---|---|
| PrtSc alone | Clipboard only — paste manually to save | No |
| Win + PrtSc | Pictures > Screenshots | Yes — PNG |
| Win + Shift + S | Clipboard (click notification to open & save) | Clipboard |
| Alt + PrtSc | Clipboard only — paste manually to save | No |
| Snipping Tool app (saved) | Wherever you choose when saving | Manual save |
| Game Bar (Win + Alt + PrtSc) | Videos > Captures | Yes — PNG |
C:\Users\[Your Username]\Pictures\ScreenshotsYou can find this in File Explorer under This PC → Pictures → Screenshots. Each file is named Screenshot (1).png, Screenshot (2).png, etc. The number increments automatically and never resets, so you can always tell which one was taken more recently.
Screenshots on Specific Devices: HP, Dell, Surface, and More
The fundamentals are the same across all Windows devices, but different manufacturers lay out their keyboards differently. Here is what changes on the most common devices:
HP Laptops
Many HP models need Fn + PrtSc for the standard Print Screen function. The Win+Shift+S shortcut works without Fn on all HP laptops. Screenshots folder: Pictures > Screenshots.
Dell Laptops
Most Dell XPS, Inspiron, and Latitude models have a dedicated PrtSc key. On some compact Dell models, try Fn + F10 or Fn + PrtSc. Win+Shift+S always works.
Microsoft Surface
Surface devices have a hardware shortcut: press Power button + Volume Up simultaneously. The screenshot auto-saves to Pictures > Screenshots. Win+Shift+S also works normally.
Desktop PCs
All standard shortcuts work on desktop PCs. The PrtSc key is usually large and clearly labelled. Win+PrtSc is the fastest option for auto-saving full desktop screenshots.
Lenovo ThinkPad
ThinkPads have PrtSc on a dedicated key on most models. On some compacts it requires Fn + PrtSc. The Fn Lock key (if available) can disable the Fn requirement permanently.
Asus & Acer
Most Asus and Acer laptops require Fn + PrtSc. Some Asus models also have a Fn + Windows + PrtSc combo for auto-save. Win+Shift+S skips all of this.
How to Take a Timed or Delayed Screenshot on Windows
Delayed CaptureHere is a scenario you have probably run into: you want to screenshot a dropdown menu, a tooltip that appears when you hover, or a right-click context menu. But the moment you press any screenshot shortcut, the menu closes. Classic problem. The solution is a delayed screenshot.
- Open the Snipping Tool app from the Start menu (search for it).
- Click the clock icon (stopwatch) in the toolbar at the top of the Snipping Tool window.
- Select your delay: 3 seconds, 5 seconds, or 10 seconds.
- Click New. The countdown starts immediately.
- During the delay, open your dropdown menu, hover over the item you want, or set up whatever state you need on screen.
- When the timer runs out, the snipping overlay appears. Drag to select your area normally.
The 3-second delay works for most cases. Use 10 seconds if you need time to navigate to a specific page, open a submenu, or switch between windows before the capture fires.
How to Take a Scrolling Screenshot or Capture a Full Webpage
Full Page CaptureWindows has no built-in scrolling screenshot feature in 2026. That gap has been filled by browsers and third-party tools. Here is what works:
- Open the webpage you want to capture fully.
- Press F12 to open Developer Tools.
- Press Ctrl + Shift + P to open the command palette.
- Type "screenshot" and click "Capture full size screenshot."
- The browser generates a full-page screenshot and downloads it as a PNG automatically.
- Right-click anywhere on the page and select "Take Screenshot."
- Click "Save full page" to capture the entire scrollable page.
For scrolling captures outside a browser — PDFs, long documents, chat apps — a free tool like ShareX (completely free, open-source) or PicPick (free for personal use) handles this well. Both have a "Scrolling window capture" mode that automatically scrolls and stitches the content into one long image.
Which Screenshot Method Should You Use? (Quick Reference)
| Your Situation | Best Method | Shortcut | Auto-Saves? |
|---|---|---|---|
| Quick capture, paste into email or chat | Print Screen | PrtSc | No |
| Select a specific area of the screen | Win + Shift + S | Win+Shift+S | Clipboard |
| Full screen, save as file automatically | Win + Print Screen | Win+PrtSc | Yes |
| Capture just one window, no background | Alt + Print Screen | Alt+PrtSc | No |
| Annotate, highlight, or add arrows | Snipping Tool (Win+Shift+S then click notification) | Win+Shift+S | Manual |
| Capture a dropdown menu or tooltip | Snipping Tool with timer delay | Start menu app | Manual |
| Gaming — full-screen game | Game Bar | Win+Alt+PrtSc | Yes |
| Full webpage (scrolling capture) | Chrome/Edge DevTools or ShareX | F12 → Cmd palette | Yes |
| No Print Screen key on keyboard | Win + Shift + S (always works) | Win+Shift+S | Clipboard |
| Surface tablet | Power + Volume Up hardware shortcut | Hardware buttons | Yes |
Screenshot Not Working on Windows? Fixes That Actually Help
TroubleshootingIf your screenshot shortcut is not doing anything — or is doing something unexpected — here are the most common causes and how to deal with them.
- Try Fn + PrtSc first. On most laptops, this is required.
- Check if another application has captured the PrtSc key. Some software (Dropbox, OneDrive, gaming overlays like Discord or Steam) intercepts PrtSc and reroutes it. Check those apps' settings.
- Switch to Win + Shift + S which is far harder for background apps to intercept.
- Check that the Screenshots folder exists at
C:\Users\[Name]\Pictures\Screenshots. If it was deleted, recreate it manually — Windows will start saving there again. - Open Settings → System → Storage and check if the Pictures folder location has been changed to a different drive. The Screenshots folder follows wherever Pictures is saved.
- If OneDrive has taken over your Screenshots folder, check OneDrive settings — it may be auto-uploading instead of saving locally.
- This happens because some applications use hardware acceleration that blocks standard screen capture. Use Win + Alt + PrtSc (Game Bar) instead — it hooks into the graphics API and can capture what normal methods cannot.
- For DRM-protected content (Netflix, Disney+, some streaming apps), screenshots are intentionally blocked. This is by design — the content provider prevents capture.
- For video players: try pausing the video first. Some players block capture only during active playback.
- Make sure Background apps are enabled in Settings — Snipping Tool relies on this to function as an overlay.
- Check Settings → Accessibility → Keyboard and confirm that keyboard shortcuts are enabled.
- Open the Snipping Tool app directly from Start menu first to make sure it is installed and working. Then try the shortcut again.
- On very rare occasions, a Windows Update can break this shortcut temporarily. A simple PC restart usually resolves it.
- Restart the PC — fixes 80% of weird shortcut behaviour
- Check that Snipping Tool is not disabled in Windows Update or via Group Policy
- Look for third-party apps (Dropbox, Steam, Discord) intercepting the PrtSc key
- Verify your Screenshots folder exists at Pictures > Screenshots
- Try Win+Shift+S as the universal alternative before anything else

10 Frequently Asked Questions About Screenshots on Windows
What is the fastest way to take a screenshot on Windows?
Press Windows + Shift + S for the fastest flexible screenshot — your screen dims and you drag to select any area you want. The result goes straight to your clipboard, ready to paste anywhere. For a full-screen shot that auto-saves without any extra steps, press Windows + Print Screen — the screen briefly dims and your screenshot lands in Pictures > Screenshots automatically. Most people end up memorising both.
Where do screenshots save on Windows 10 and 11?
It depends on which method you used. Windows + Print Screen auto-saves to C:\Users\[YourName]\Pictures\Screenshots as a numbered PNG file. Screenshots taken with PrtSc alone or Alt + PrtSc only go to the clipboard — they are not saved until you paste them into Paint or another app and save manually. The Game Bar saves to Videos\Captures. The Snipping Tool saves wherever you choose when you hit the save button.
How do I take a screenshot on a Windows laptop with no Print Screen key?
Press Windows + Shift + S — this shortcut works on every Windows 10 and 11 laptop regardless of keyboard layout. It opens the Snipping Tool overlay immediately and does not require a PrtSc key at all. On Surface devices, you can also press Power + Volume Up simultaneously to take a full-screen screenshot that auto-saves to Pictures > Screenshots.
What is the difference between Snipping Tool and Snip and Sketch in Windows?
In Windows 11, Microsoft merged both tools into one updated Snipping Tool — there is no separate Snip & Sketch anymore. In Windows 10, Snip & Sketch was the modern upgrade to the older Snipping Tool, adding the Win+Shift+S shortcut and annotation features. Both share the same core functionality. If you are on Windows 11, use the Snipping Tool — it handles everything both older apps could do, plus supports screen recording and more editing features.
How do I screenshot just one window and not the whole screen?
Click on the window you want to capture to make it active, then press Alt + Print Screen. This captures only that window — no background, no taskbar, no other apps — and copies it to your clipboard. Open Paint and press Ctrl+V to paste and save. Alternatively, press Win + Shift + S and choose the Window Snip mode (the third icon in the toolbar), then click on the window you want — this method gives you an immediate editing option too.
How do I screenshot on an HP or Dell laptop?
On most HP laptops, the PrtSc key requires pressing Fn + PrtSc. On Dell laptops, many models have a standalone PrtSc key but some compact models also need Fn + PrtSc. In both cases, Windows + Shift + S works without needing the Fn key at all and is usually the easier option. Win+PrtSc for auto-saving also works on both brands with or without the Fn key in most cases.
What is the Snipping Tool shortcut in Windows 10 and 11?
The Snipping Tool shortcut in both Windows 10 and Windows 11 is Windows + Shift + S. This opens the screenshot overlay directly, without needing to find or open the app first. Once you have taken your snip, click the small thumbnail notification that appears in the bottom-right corner to open the full Snipping Tool editor for annotations and saving.
How do I take a screenshot in a game on Windows?
Press Windows + Alt + Print Screen to take an instant screenshot through the Xbox Game Bar without opening the overlay. The screenshot auto-saves to your Videos > Captures folder. If you get a black screen using other methods (which is common in full-screen exclusive games), the Game Bar works because it integrates directly with the DirectX graphics layer that games use.
Can I take a timed or delayed screenshot on Windows?
Yes. Open the Snipping Tool app from the Start menu, click the clock/stopwatch icon in the toolbar, and choose a delay of 3, 5, or 10 seconds. Click New and you have that many seconds to position your screen — open a dropdown menu, hover over an item, or set up whatever you need — before the capture fires automatically. This is the built-in solution and works well for capturing menus and tooltips that disappear when you press keys.
How do I take a scrolling screenshot or capture a full webpage in Windows?
Windows does not have a built-in scrolling screenshot tool. For full-page web captures in Chrome or Edge: press F12 to open DevTools, press Ctrl+Shift+P, type "screenshot" and select "Capture full size screenshot" — it downloads a complete page PNG. In Firefox: right-click the page and choose "Take Screenshot" then "Save full page." For other applications, the free tools ShareX (fully free) or PicPick (free for personal use) both include scrolling window capture modes.
Related Posts
- PrtSc → Copies full screen to clipboard
- Win + PrtSc → Auto-saves to Pictures > Screenshots
- Win + Shift + S → Select area (best overall)
- Alt + PrtSc → Active window only
- Win + Alt + PrtSc → Game Bar screenshot
- Win + G → Open Game Bar overlay
- Win+PrtSc: Pictures > Screenshots
- Game Bar: Videos > Captures
- PrtSc / Alt+PrtSc: Clipboard only — paste to save
- Win+Shift+S: Clipboard (click notification to save)
- Snipping Tool app: Manual save location
Test Your Mic & Sound — Free
While you're here — need to check if your microphone or speakers are working? Our free browser-based tools test both with no downloads required.
Test Your Microphone Test Your Speakers- HP: Try Fn + PrtSc if PrtSc alone fails
- Dell: Most models have standalone PrtSc
- Surface: Power + Volume Up = auto-saved screenshot
- Lenovo: Fn + PrtSc on compact models
- Asus/Acer: Usually requires Fn + PrtSc
- Any laptop: Win+Shift+S always works
- Rectangle snip — drag a box around any area
- Freeform snip — draw any custom shape
- Window snip — click any open window
- Full-screen snip — captures everything
- Delay mode — 3, 5, or 10 second timer