Configuring Default Playback Device in Windows 10 and 11 (2026)
By Jon — Windows Audio Troubleshooting Expert | | 18 min read
Quick Answer — How to Set Your Default Playback Device
- Right-click the speaker icon in the taskbar → Open Sound settings
- Under Output, choose your speakers, headphones, or Bluetooth device from the dropdown
- For more control: press Windows + R, type
mmsys.cpl, hit Enter - On the Playback tab, right-click your device → Set as Default Device
- For calls: also right-click → Set as Default Communication Device
- Test it at mictest.pro/sound-test to confirm both channels work
Table of Contents
- Why Default Playback Device Settings Matter
- Understanding the Playback Device Types in Windows
- Step 1: Open Sound Settings (The Modern Way)
- Step 2: Choose Your Default Output Device
- Step 3: Use the Classic Sound Control Panel for Full Control
- Step 4: Set Per-App Audio Output in Windows 11
- Step 5: Set Default Communication Device for Calls
- Quick Switch: Change Audio Output from the Taskbar
- Device Not Showing in Playback Devices? Fix It Here
- Stop Windows from Auto-Switching Your Playback Device
- Fixing HDMI Audio Taking Over as Default
- Which Method Should You Use?
- Test Your Playback Device After Configuring
- 10 Frequently Asked Questions
Why Default Playback Device Settings Matter More Than You Think
Here is something Windows does quietly in the background that most people never realise: every time you plug in a new audio device — USB headset, HDMI monitor, Bluetooth speaker — Windows may automatically reassign which device plays your audio. Sometimes it picks the right one. A lot of the time, it does not.
I have seen this exact situation play out hundreds of times. Someone buys a nice pair of headphones, plugs them in, and then spends 20 minutes wondering why their laptop speakers are still playing audio at full volume while they have headphones on their head. The answer is almost always the same: Windows has a different device set as default, and it is playing to that one instead.
Here is why this matters beyond just the annoyance factor:
- Sound quality — Playing audio through the wrong device often means you are getting lower quality output than you paid for. Your £150 USB headphones are sitting idle while your £2 built-in laptop speaker does all the work.
- Privacy — If you are on a work call and your output is set to your speakers, the whole office hears it. Setting a headset as the default communication device prevents that.
- Gaming and streaming — Many games and streaming apps pick up the system default at launch. If it is wrong, you are adjusting audio in-game rather than at the OS level, which is backward.
- Meetings — Teams and Zoom can use a different "communication device" setting from your general audio, which is genuinely useful once you know how it works.
Understanding the Playback Device Types in Windows
Before we jump into the steps, it helps to understand the three types of audio roles Windows can assign to a playback device. This is one of those things the Windows UI does not explain well, so a lot of people never know these distinctions exist.
This is where all general audio goes — music, videos, games, system sounds, YouTube, Spotify, everything. When you do not manually specify otherwise, audio goes here. This is what most people mean when they say "default playback device."
This device is used specifically by communication apps — Microsoft Teams, Zoom, Skype, Discord, Google Meet. When a call comes in, Windows can route call audio to this device and automatically duck (lower) all other audio. Very useful if you want calls on your headset and music on your speakers.
The newest and most flexible option. You assign a specific output device to a specific app — Chrome uses Bluetooth speakers, Discord uses your headset, Spotify uses your TV via HDMI. All simultaneously, without interfering with each other.
Step 1: Open Sound Settings — The Modern Way
Windows Settings AppWindows 11 moved most audio controls into the Settings app, which is cleaner than the old Control Panel approach. Windows 10 also has this, though the layout looks slightly different. Either way, this is the fastest route for most people.
- Fastest: Right-click the speaker icon in the bottom-right taskbar and select Sound settings (Windows 11) or Open Sound settings (Windows 10).
- Keyboard shortcut: Press Windows + I to open Settings → go to System → then Sound.
- Search: Click the Start button or press the Windows key and type "Sound settings" — it appears at the top of search results immediately.

Step 2: Choose Your Default Output Device
Selecting Your DeviceOnce you are in Sound Settings, the actual selection is straightforward. What trips people up is understanding which device name corresponds to which physical hardware — Windows sometimes uses names that are not particularly helpful.
- In Sound Settings, look for the Output section at the top of the page.
- Click the dropdown under "Choose where to play sound" (Windows 11) or "Choose your output device" (Windows 10).
- A list of all connected audio devices appears. Common entries include:
- Speakers — Realtek(R) Audio → your built-in laptop or PC speakers
- Headphones — Realtek(R) Audio → wired headphones plugged into the 3.5mm jack
- Speakers — USB Audio Device → USB headset or USB speakers
- Your headphone name — Bluetooth Hands-free → Bluetooth headset
- DELL U2722D — HDMI → audio output through your monitor
- Click the device you want as your default. The change applies instantly — no restart or OK button needed in Windows 11.
- You will hear audio shift to that device immediately if something is playing.
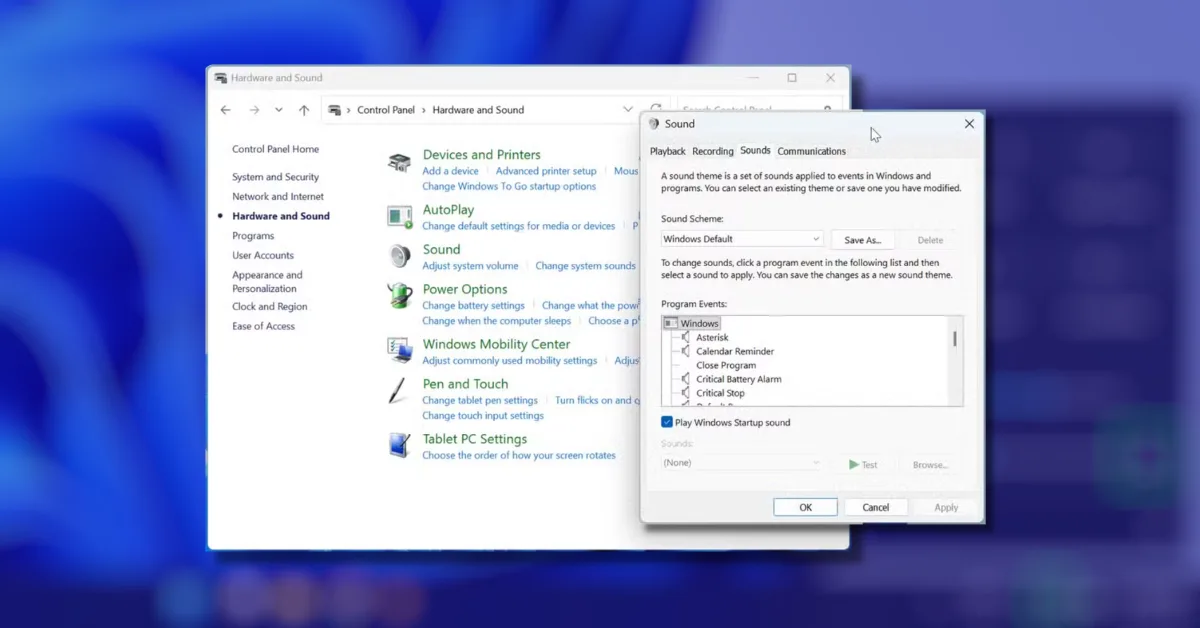
Step 3: Use the Classic Sound Control Panel for Full Control
Power User MethodThe modern Settings page is fine for basic switching, but it hides options that the classic Sound Control Panel exposes. If you want to set a Default Communication Device separately, see hidden devices, or manage multiple outputs with precision — this is the panel you need. It has been in Windows since Vista and still has no real equivalent in the new Settings UI.
- Press Windows + R to open the Run dialog.
- Type
mmsys.cpland press Enter. The Sound Control Panel opens immediately. - You are now on the Playback tab — this shows every audio output device Windows is aware of, including hidden and disabled ones (if you choose to show them).
- To set your default: right-click your preferred device and select "Set as Default Device". A green checkmark appears next to it.
- To set your communication default: right-click and select "Set as Default Communication Device". A phone icon appears next to it.
- Click OK to apply.
Step 4: Configure Per-App Audio Output — The Feature Most People Don't Know Exists
App-Level ControlThis is one of those Windows features that genuinely changes how you use audio once you discover it. Instead of having one global default, you can tell each application which device to use — completely independently. Spotify plays through your bookshelf speakers. Discord uses your headset. Your video editing software routes through your studio monitors. All at the same time.
- Go to Settings → System → Sound.
- Scroll down and click Volume mixer.
- Every application currently using audio appears here with its own volume slider and an Output dropdown.
- Click the Output dropdown for any app and choose which playback device it should use.
- The change applies instantly — no restart required.
- Go to Settings → System → Sound.
- Scroll down to Advanced sound options and click App volume and device preferences.
- Each running app is listed with its own Output dropdown.
- Select a device per app from the dropdown. Default means it follows the system default.
Step 5: Set Your Default Communication Device for Calls
Calls and MeetingsIf you use Teams, Zoom, Discord, or any video call platform regularly, this setting is worth a few minutes of your time. The Default Communication Device is completely separate from your general Default Device, and setting them independently unlocks a genuinely useful workflow.
For example: you can set your Bluetooth headphones as the Default Communication Device and your desk speakers as the Default Device. Music plays on the speakers. When a Teams call comes in, audio routes to your headphones automatically. Windows also has a feature called Communications audio ducking — it lowers the volume of other audio when a call is detected. That feature uses the Communication Device setting to decide what to do.
- Open the classic Sound Control Panel: press Windows + R, type
mmsys.cpl, press Enter. - On the Playback tab, right-click your headset or headphones.
- Select "Set as Default Communication Device". A phone icon appears next to the device name.
- Right-click your speakers and select "Set as Default Device" (if they are not already).
- Click OK.
- Open your communication app (Teams, Zoom etc.) and go into its audio settings. Make sure the output is set to "Default" or "System Default" — this tells the app to follow Windows' Communication Device setting.
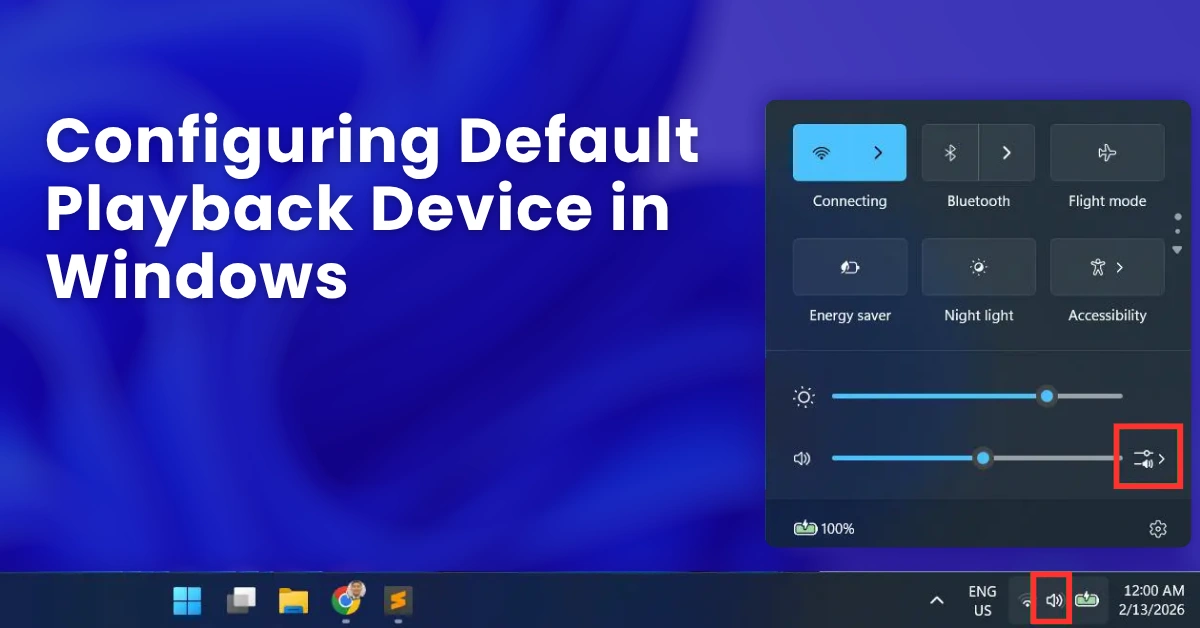
Quick Switch: Change Your Playback Device Directly from the Taskbar
Fastest MethodIf you regularly switch between two audio devices — say, headphones for focused work and speakers when you are doing something casual — the taskbar method is the fastest route with no menus to navigate.
- Click the speaker/volume icon in the bottom-right taskbar to open the volume flyout.
- Look for the small arrow (chevron icon) to the right of the volume slider. Click it.
- A list of all active playback devices appears. Click any device to immediately make it the active output.
- Audio switches instantly — no Settings menu needed.
- Click the speaker icon in the taskbar.
- At the top of the volume slider panel, click the device name (shown in small text above the slider).
- An expanded list of all playback devices appears.
- Click any device to switch to it immediately.
Device Not Showing in Playback Devices? Fix It Here
Hidden Device FixNothing is more frustrating than a device that is physically connected but simply refuses to appear in the playback list. Before assuming the device is broken, try these steps — the vast majority of missing device cases are resolved by one of them.
- Show hidden and disabled devices: Open the Sound Control Panel (
mmsys.cpl), go to the Playback tab, right-click in an empty area, and check both "Show Disabled Devices" and "Show Disconnected Devices". If your device appears greyed out, right-click it and select Enable. - Unplug and replug: For USB or 3.5mm devices, physically disconnect and reconnect the cable. Windows sometimes needs this event to register the device again.
- Check the physical jack: On laptops, the 3.5mm jack is often a combo input/output. If you plug in a 4-pole headset (with microphone) into a port that only supports 3-pole (stereo out), the headphones may not register. Try a different port.
- Restart the Windows Audio service: Press Windows + R, type
services.msc, find Windows Audio, right-click it, and select Restart. Then check the Playback tab again. - Update audio drivers: Go to Device Manager → Sound, video and game controllers → right-click your audio device → Update driver. An outdated Realtek or High Definition Audio driver can cause devices to drop from the list.
Stop Windows from Auto-Switching Your Default Playback Device
Prevent Unwanted SwitchesWindows has a habit of automatically promoting newly connected devices to the default. You plug in a monitor, and suddenly audio is going to the TV speakers you forgot were built into that display. You connect a USB dongle, and audio stops working on your headphones. This behaviour is the number one source of the "why is my audio broken?" support call.
- Open the Sound Control Panel (
mmsys.cpl) and go to the Playback tab. - Right-click in an empty area and check "Show Disabled Devices" and "Show Disconnected Devices" so you can see all devices.
- Right-click each device you do not want Windows to ever switch to and select Disable. This prevents Windows from auto-promoting it when it is connected.
- Leave only the devices you actually use in an Enabled state.
- Click OK.
Fixing HDMI Audio Hijacking Your Default Playback Device
HDMI Audio IssueHDMI audio taking over as default is one of the most common complaints I see. You connect a monitor or projector, and suddenly your speakers go silent because Windows helpfully switched everything to the monitor's built-in speakers — which you have never used and do not want to use.
- Open the Sound Control Panel: Windows + R → type
mmsys.cpl→ Enter. - On the Playback tab, find any entry that mentions HDMI, DisplayPort, or your monitor name (e.g., "DELL U2722D HDMI").
- Right-click it and select Disable. This prevents Windows from auto-switching to it.
- If you genuinely need HDMI audio sometimes (like when presenting), leave it Enabled but do not set it as Default — switch to it manually from the taskbar when needed.
- Click OK to save. Your speakers or headphones should now stay as default even when you connect or disconnect monitors.
Which Method Should You Use?
| Situation | Best Method | Time Required | Win 10 | Win 11 |
|---|---|---|---|---|
| Quick switch between two devices | Taskbar speaker icon → arrow/chevron | ~5 sec | ||
| Set a permanent default device | Sound Settings → Output dropdown | ~30 sec | ||
| Set different devices for calls vs music | Sound Control Panel (mmsys.cpl) | ~2 min | ||
| Route individual apps to specific devices | Settings → Sound → Volume mixer | ~3 min | ||
| Stop HDMI or USB from hijacking audio | Sound Control Panel → Disable device | ~2 min | ||
| Device not showing in list at all | Show Disabled Devices + Enable | ~5 min |
Test Your Default Playback Device After Configuring
Once you have set your default device, do a proper test before calling it done. A 30-second check now prevents you from showing up to a meeting with no audio or discovering mid-movie that only one channel is working.
- Built-in Windows test: In the Sound Control Panel (Playback tab), right-click your default device and select Test. A chime plays through that device — you will hear it in both ears if it is a headphone, or from both speakers in a stereo setup.
- Left and right channel test: Visit mictest.pro/sound-test — it plays audio separately through the left and right channels so you can confirm both sides are working. Extremely useful after switching Bluetooth devices, because Bluetooth audio sometimes connects with only one channel active until the profile fully initialises.

10 Frequently Asked Questions
How do I set a default playback device in Windows 10 and 11?
Right-click the speaker icon in your taskbar and open Sound settings. Under Output, use the dropdown to select your preferred device — the change applies immediately. For more control, press Windows + R, type mmsys.cpl, and press Enter. On the Playback tab, right-click your preferred device and select Set as Default Device. A green checkmark confirms it is active. Click OK to save.
Why does Windows keep switching my default playback device automatically?
Windows automatically promotes newly connected devices — HDMI monitors, USB headsets, Bluetooth speakers — to the default when it detects them. To stop this, open the Sound Control Panel (mmsys.cpl), go to the Playback tab, right-click each device you do not want as default, and select Disable. Windows will stop switching to disabled devices. Only leave the devices you actually want active as Enabled.
What is the difference between Default Device and Default Communication Device?
The Default Device handles all general audio — music, videos, games, system sounds. The Default Communication Device is used specifically by communication apps like Teams, Zoom, Skype, and Discord. Setting them independently lets you route call audio to your headset while music plays through your speakers — simultaneously. Windows also uses the Communication Device setting to apply automatic volume ducking during active calls.
How do I set a different audio output for a specific app in Windows 11?
Go to Settings → System → Sound → Volume mixer. Every running application using audio appears here with its own output dropdown. Select a different device for any individual app. On Windows 10, go to Settings → System → Sound → App volume and device preferences. The app must be running and actively using audio to appear in the list.
Why can't I see my headphones in the Playback Devices list?
The most likely cause is that the device is hidden or disabled. Open the Sound Control Panel (mmsys.cpl), go to the Playback tab, right-click in an empty area, and check both "Show Disabled Devices" and "Show Disconnected Devices". If your headphones appear greyed out, right-click and select Enable. If they still do not appear, unplug and replug the headphone cable, or restart the Windows Audio service via services.msc.
How do I quickly switch my audio output device without going into Settings?
In Windows 11, click the speaker icon in the taskbar, then click the small arrow/chevron to the right of the volume slider. A list of all available playback devices appears — click any of them to switch instantly. In Windows 10, click the speaker icon and then click the device name shown above the volume slider to expand the full device list. No Settings or Control Panel required for either method.
What does "Set as Default Communication Device" mean in Windows?
It designates that device specifically for communication apps — Teams, Zoom, Discord, Skype. When those apps are active, audio routes to the Communication Device. Windows can also automatically duck (lower) other audio during calls when this setting is configured. To enable this behaviour, set your headset as the Communication Device in the Sound Control Panel and make sure the communication app's output is set to Default or System Default.
Why does my HDMI monitor keep becoming the default audio device?
Windows auto-promotes HDMI audio because it detects the display's audio capability and treats it as a new device. To stop it: open the Sound Control Panel (mmsys.cpl), find the HDMI device on the Playback tab, right-click it, and select Disable. Windows will no longer switch to it when you connect the monitor. If you occasionally need HDMI audio for presentations, you can Enable it temporarily, use it, and then Disable it again.
Can I use two audio output devices at the same time in Windows?
Not natively with a single audio source — Windows only supports one Default Device at a time. However, using the Volume mixer's per-app output feature, you can have different applications playing through different devices simultaneously. For true audio mirroring (same audio going to two devices), you need a third-party tool like Voicemeeter Banana or a virtual audio cable setup. These are free and work well for streaming and content creation setups.
How do I test my default playback device after configuring it?
In the Sound Control Panel (Playback tab), right-click your default device and select Test — Windows plays a chime through that device. For a thorough stereo test, visit mictest.pro/sound-test, which plays distinct audio through the left and right channels separately. This is especially useful after pairing Bluetooth headphones, where one channel sometimes takes a moment to activate fully after connection.
Related Posts
- Right-click speaker icon → Sound settings
- Output → pick your device
- Win+R → mmsys.cpl → Playback tab
- Right-click → Set as Default Device
- Volume mixer for per-app control
- Test at mictest.pro/sound-test
Test Your Audio Output — Free
After configuring your default playback device, verify both channels are working correctly. Our free sound test plays audio through left and right channels separately — no install, works in any browser instantly.
Open Sound Test at MicTest.pro- Win + I: Open Settings → Sound
- Win + R → mmsys.cpl: Classic Sound Control Panel
- Win + R → services.msc: Restart Windows Audio service
- Taskbar speaker → arrow: Quick device switch (Win 11)
- Right-click Playback tab: Show hidden devices